

SHOP BY CATEGORY
Aluminum Side Panel Kits →
ALUMISSION SHOP
Home » Aluminum Fences » Aluminum Wall Topper Kits

Aluminum Wall Topper Kits

Shop Alumission aluminum wall topper kits to add height, privacy and a modern finish above suitable existing walls. Choose five slat styles, seven nominal heights from 1′ to 4′, and modular runs in 6′ increments. Explore completed wall topper projects, compare designs, and review detailed specifications, a shop drawing and installation questions below.

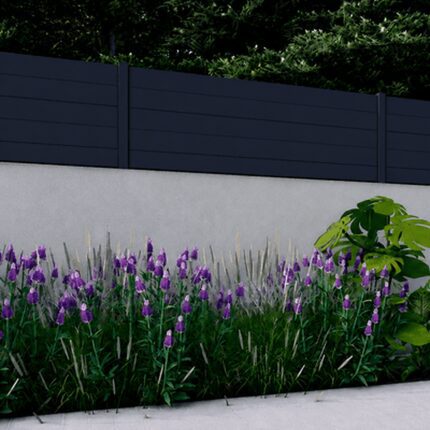
Black New York Style Alumission aluminum wall topper kit installed above a garden wall
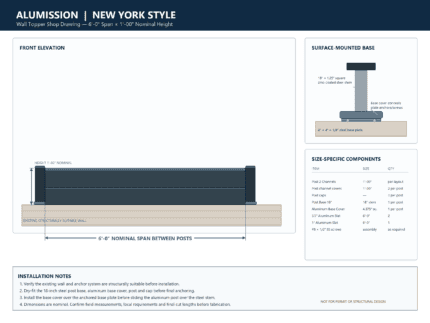
New York Style aluminum wall topper shop drawing, 6-foot span by 1-foot high, with base plate and base cover
Select options This product has multiple variants. The options may be chosen on the product page
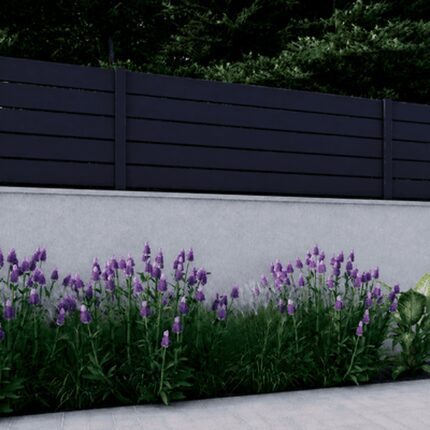
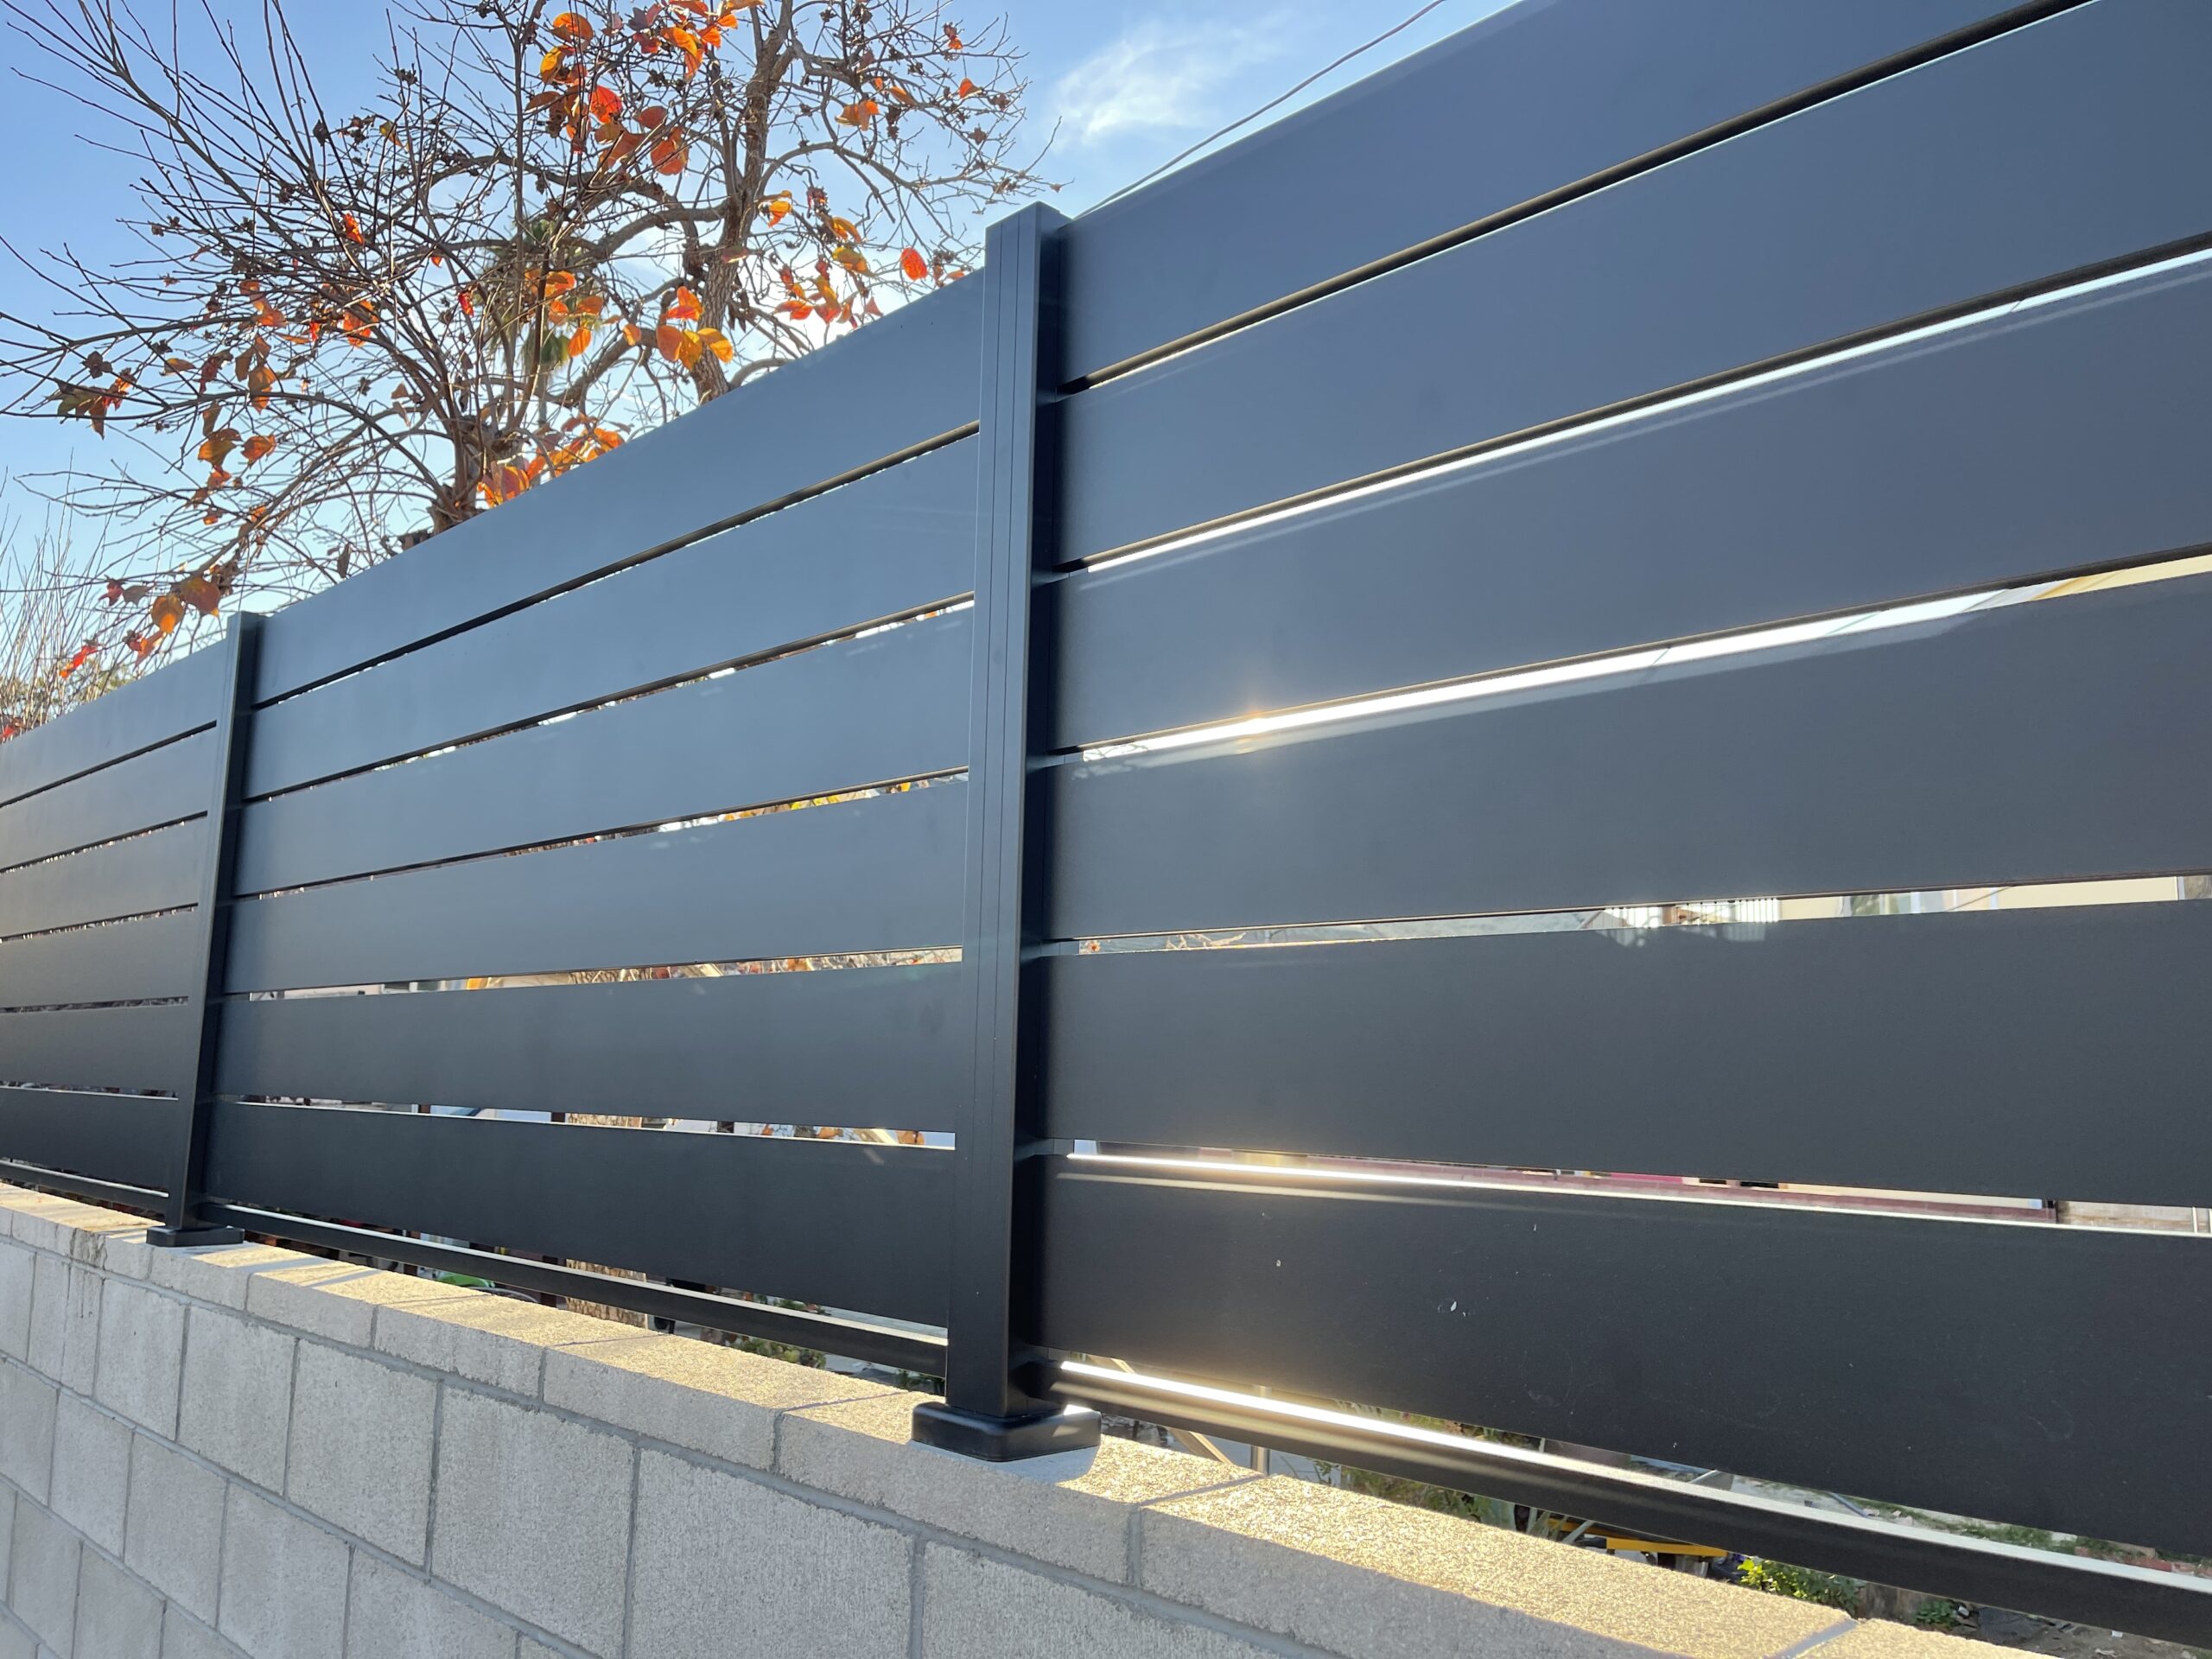
Black Los Angeles Style Alumission aluminum wall topper kit installed above a garden wall
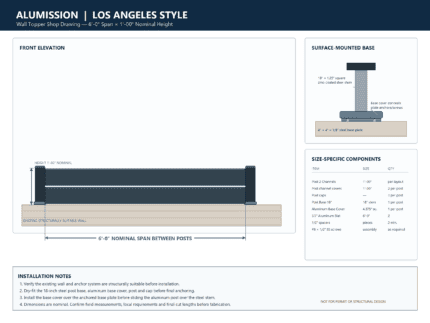
Los Angeles Style aluminum wall topper shop drawing, 6-foot span by 1-foot high, with base plate and base cover
Select options This product has multiple variants. The options may be chosen on the product page

Horizontal Aluminum Wall Topper – Los Angeles Style

STARTING AT $456.69
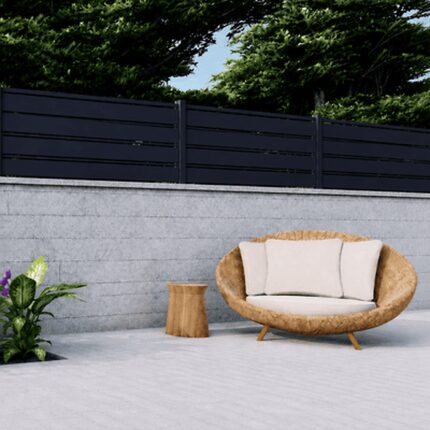
Black Miami Style Alumission aluminum wall topper kit installed above a modern patio wall
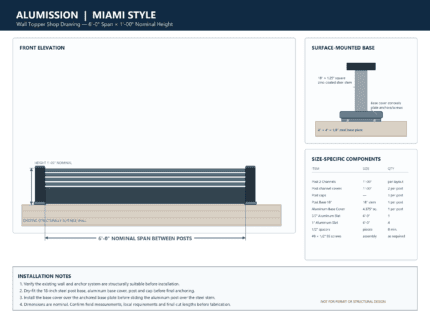
Miami Style aluminum wall topper shop drawing, 6-foot span by 1-foot high, with base plate and base cover
Select options This product has multiple variants. The options may be chosen on the product page
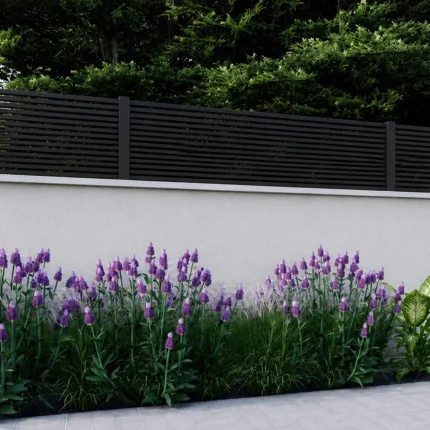
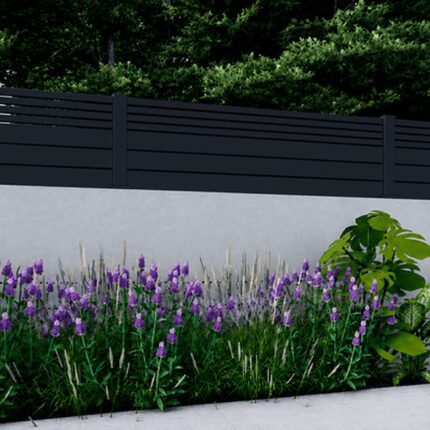
Black San Francisco style aluminum wall topper above a white garden wall
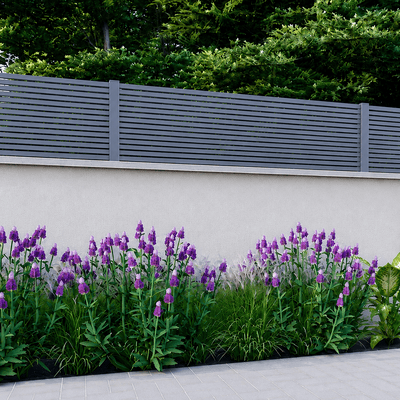
Dark gray San Francisco style aluminum wall topper with narrow horizontal slats above a garden wall
Select options This product has multiple variants. The options may be chosen on the product page
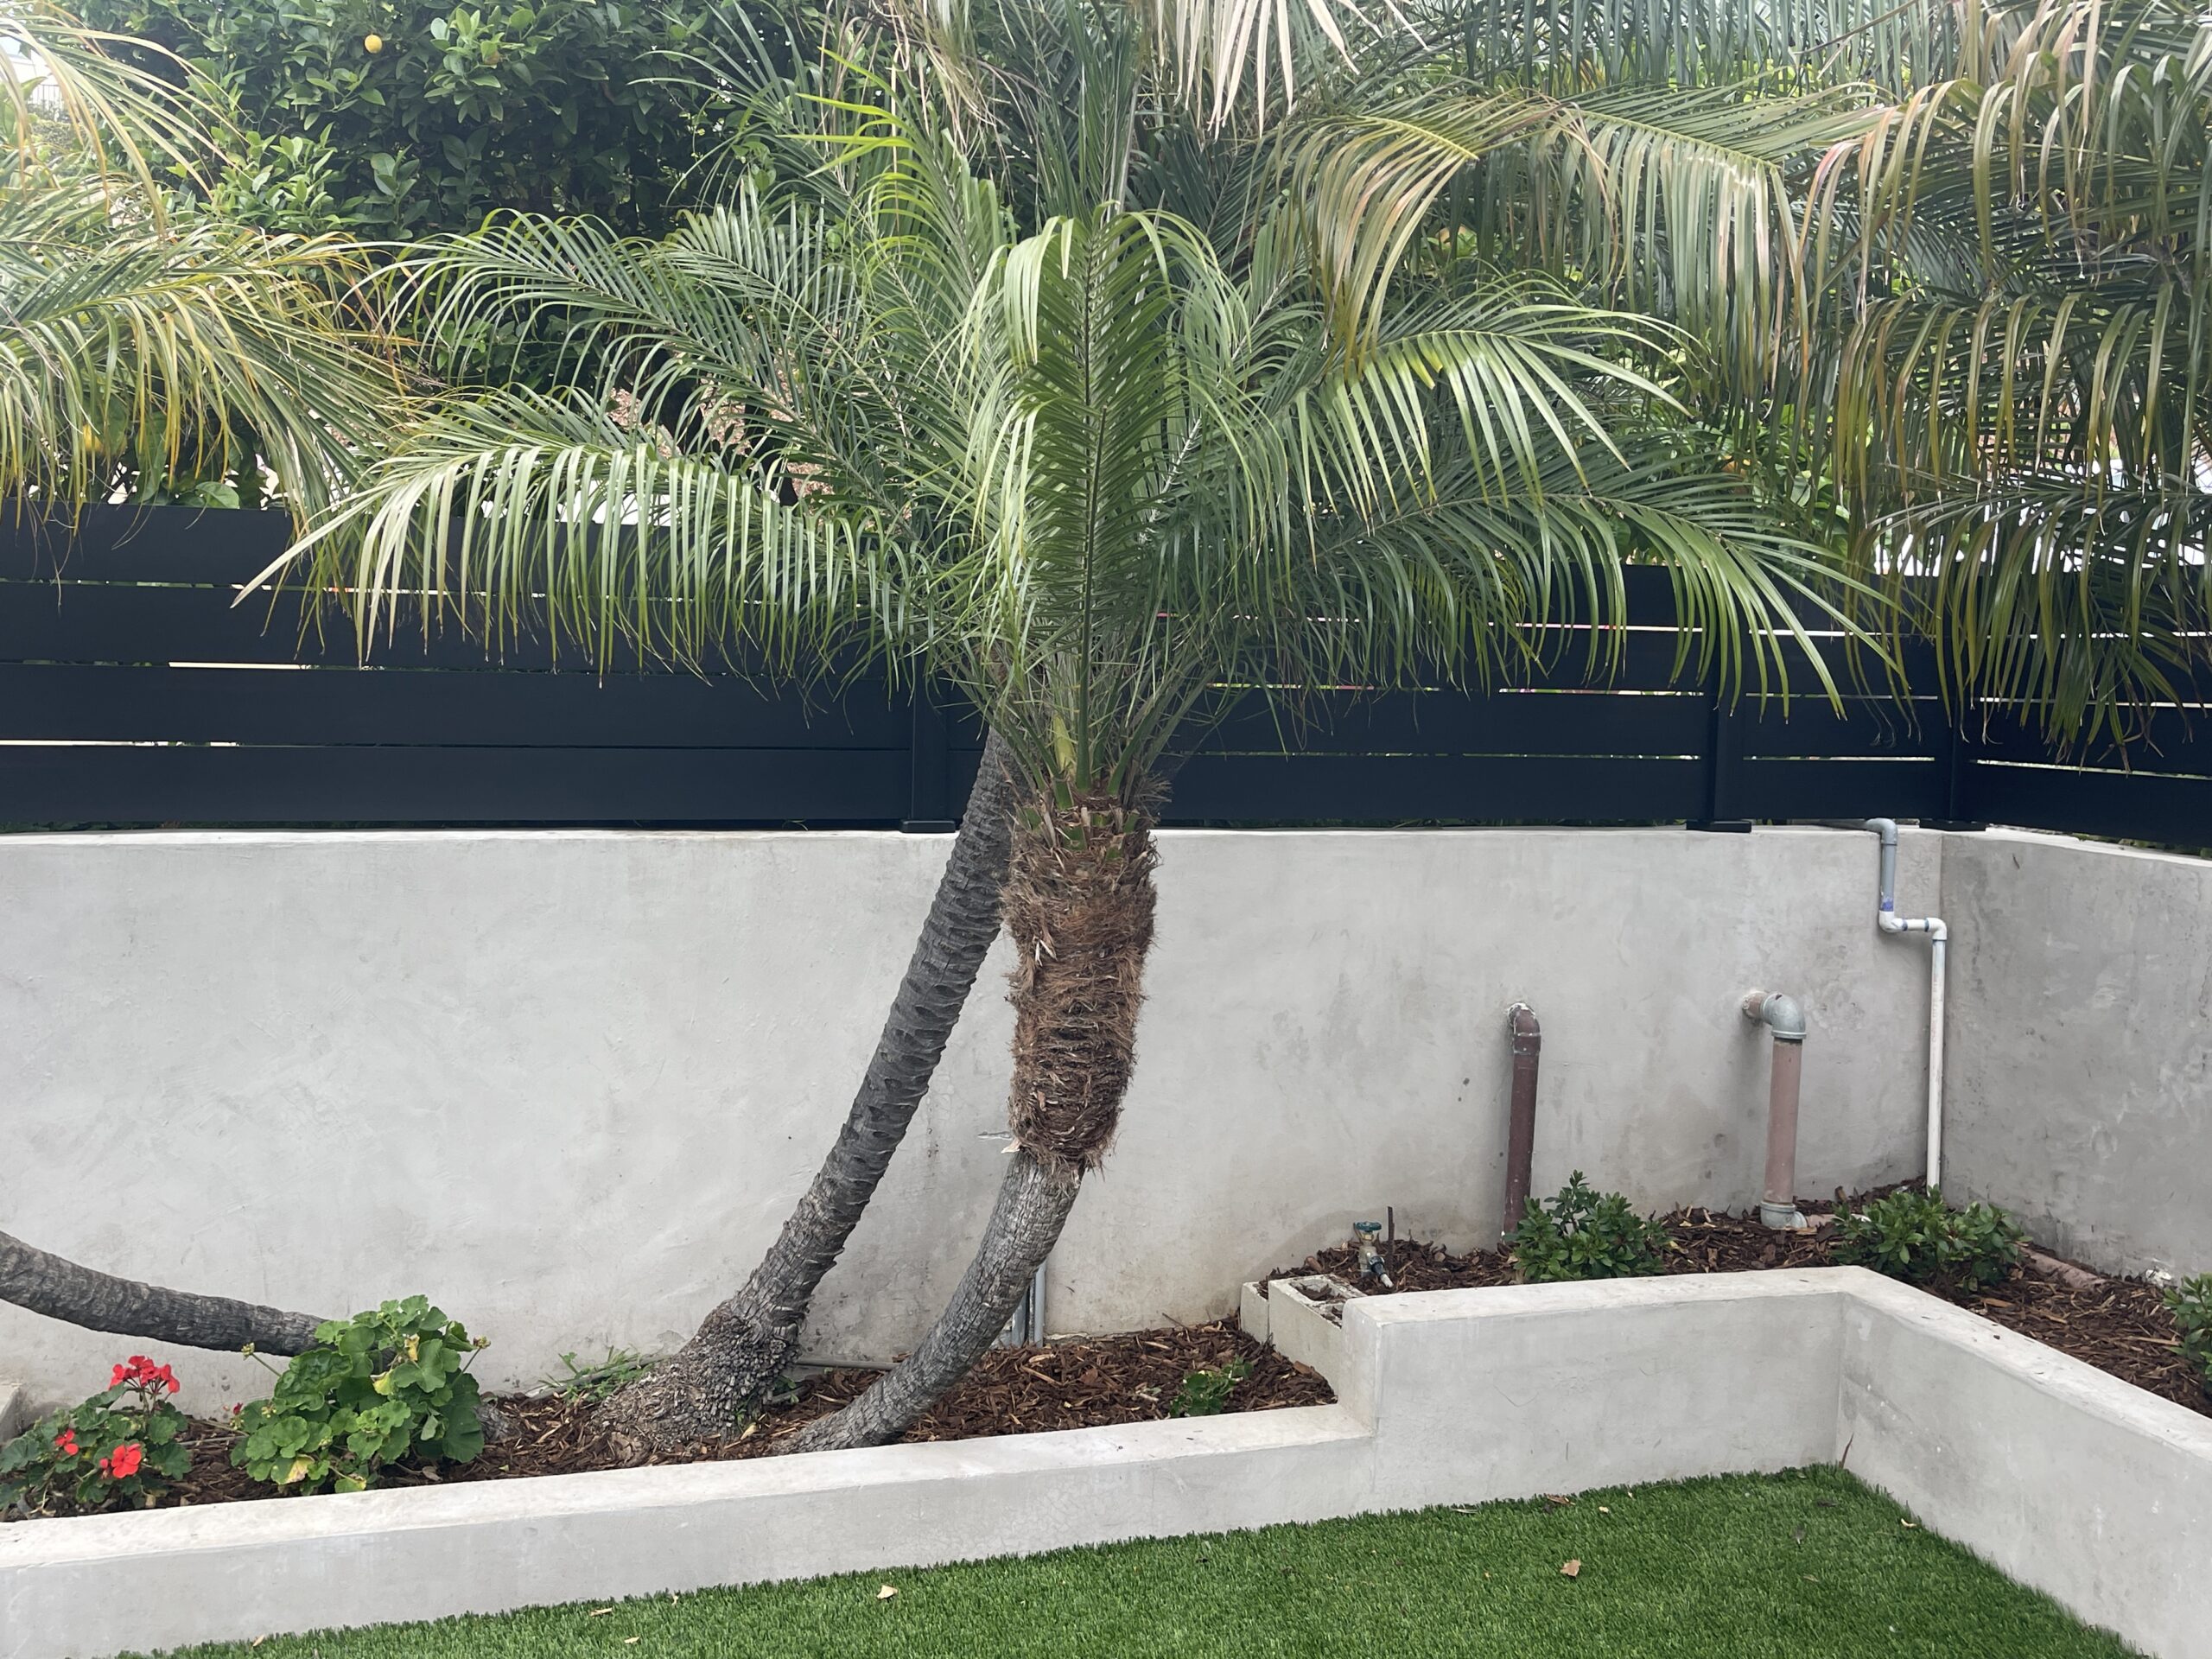
Black Dallas Style Alumission aluminum wall topper kit installed above a garden wall
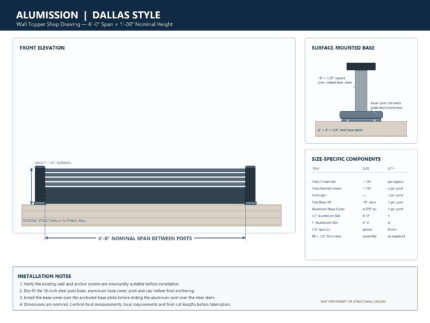
Dallas Style aluminum wall topper shop drawing, 6-foot span by 1-foot high, with base plate and base cover
Select options This product has multiple variants. The options may be chosen on the product page

Semi-Private Aluminum Wall Topper – Dallas Style

STARTING AT $470.67

FIRE RESISTANT

ALL ALUMINUM

RECYCLABLE

MAINTENANCE FREE

WEATHERPROOF

TERMITE FREE

WATER RESISTANT

MADE IN USA

More Info

Real Wall Toppers. Real Privacy.

See how customers finish existing walls with Alumission. Every project in this carousel is selected from our Wall toppers project type.

View All Wall Topper Projects →
Product Details

Aluminum wall topper kits for added height and privacy.

Turn the top of a suitable existing wall into a clean, modern privacy screen. Alumission aluminum wall topper kits combine horizontal slats, matching posts and concealed base hardware for a coordinated finish above concrete, block and other properly prepared structural walls.

Choose the amount of screening you want—from evenly spaced slats to New York Style’s tightly stacked privacy layout. Powder-coated aluminum gives patios, yards and property boundaries a finished appearance without routine wood staining.

Find Your Wall Topper Style →
7 heightsNominal 1′ through 4′
6′ modulesPlan short sections or long runs
5 stylesSpaced designs or privacy infill

More screening above your wall

Add coverage where an existing wall falls short of the desired sightline. Choose height and spacing together: smaller openings screen more of the view, while spaced styles preserve more openness and light.

Made in USA. A coordinated finish.

American-made aluminum profiles bring the design together. Match your gate, fence and wall topper through the Alumission style range. Posts, slats and finishing pieces create consistent horizontal lines, with base covers concealing mounting fasteners.

Made for field fitting

Cut components to suit the measured installation. Intermediate posts support each module, and separate sections can be planned for wall steps, corners and shorter end bays.

Low-maintenance outdoor material

Aluminum does not rot or develop ordinary steel’s red rust. Keep the powder-coated surface clean, inspect the steel bases and anchors, and maintain any damaged protective finish.

What comes with the kit?

Your selected style and size determine the quantities. Current wall topper kit schedules include:

  • Two-channel aluminum posts, with two covers and one matching cap per post.
  • An 18″ zinc-coated steel post base and aluminum base cover for every post.
  • 6′ horizontal slats in the selected style’s size-specific quantities.
  • Spacers where required by the chosen pattern.
  • Stainless steel self-drilling assembly screws.

Plan separately: wall anchors, sealant, tools and any required structural design. Select the anchoring system for the wall material and project loads.

Compare the designs

Choose the look. Then choose your size.

Wall topper styleSlat pattern and privacyBuild your kit
Los AngelesBroad 5.5″ slats with ½″ gaps for a clean, evenly spaced look.Choose Los Angeles →
New YorkTightly stacked slats with no intentional view-through gap for maximum visual screening.Choose New York →
DallasWide slats below a four-slat 1″ accent band, with ½″ spacing.Choose Dallas →
MiamiA centered four-slat 1″ accent band framed by broad horizontal slats.Choose Miami →
San FranciscoRepeating 1″ horizontal slats with ½″ gaps for a finer, more open pattern.Choose San Francisco →

Choose Black, Bronze, White, Dark Gray, Light Gray or Wood from the available product options. Select the height, nominal run length and finish on the product page to see your combination’s current price.

Measure and order with confidence.

01 / Measure

Map the wall

Record each straight run, wall-top width, existing wall height, steps, corners and gate openings. Photograph the coping and both sides of the wall. Check that the structure is suitable for the added topper and loads.

02 / Choose

Set the height and style

Select nominal 1′–4′ height in 6″ increments and the pattern that suits your privacy goal. Check the combined installed height and any project requirements before placing the order.

03 / Lay out

Count modules and posts

For a straight continuous run, allow one post per complete 6′ module plus a final end post. Confirm actual channel engagement and post centers; the nominal kit length is not a guaranteed clear opening.

04 / Assemble

Fit the mounting system

Anchor each steel base to suitable structural material, seal the penetrations, fit the base cover, then sleeve and secure the aluminum post. Install the slats and spacers, followed by covers and caps.

Technical Specifications

Dimensions, components and mounting details.

Use this specification guide with the selected product’s material schedule. Wall-topper height, nominal run length and final installed dimensions should be checked together before fabrication.

SpecificationDetails
ApplicationWall-mounted horizontal aluminum screening above a suitable existing structural wall.
Nominal kit heights1′, 1½′, 2′, 2½′, 3′, 3½′ and 4′. Verify the finished elevation with the base, cover and cap.
Nominal run lengths6′–96′ in 6′ increments, as offered by the current product selectors.
Module / supplied slats6′ horizontal slat stock. Post centers and clear opening depend on channel engagement and final cuts.
Straight-run post quantityOne post per complete module, plus one terminal post. Example: 24′ nominal = 4 modules + 5 posts.
Aluminum postPost 2 Channels: 3.500″ × 1.752″ cross-section; approximately 1.299″ square center cavity.
Channel fitPost opening 0.827″; approximately 1″ slat insertion depth. Verify the actual fit and installation tolerance.
Post material6063-T6 extruded aluminum, powder coated. Nominal unmarked profile wall: 0.057″.
Broad slat profile5.5″ Aluminum Slat: 5.500″ × 0.803″, nominal wall 0.053″, 6063-T6 aluminum.
Other infill widths1″ and size-specific 2.5″ profiles appear in the style schedules. Use the selected kit’s material list.
Standard spaced patterns½″ gaps in Los Angeles, Dallas, Miami and San Francisco layouts. Slat count and arrangement depend on height and style.
Privacy patternNew York uses stacked slats and size-specific finishing profiles without an intentional view-through gap.
Post finishingTwo covers and one matching cap per post; fit to the selected post height.
Steel post baseZinc-coated Post Base 18″, one per post.
Base plate4″ × 4″ × ⅛″ plate with four ⅜″ mounting holes. Hole diameter does not specify the required anchor.
Base insert18″ tube; 1¼″ square outside section with ⅛″ wall. Confirm fit and any trimming needed for shorter posts.
Base coverAluminum Base Cover: 4.375″ square × 1″ high, 1.310″ square center opening.
Cover installationFit over the steel base before sleeving the aluminum post onto the insert. Covers conceal the base fasteners.
FinishesBlack, Bronze, White, Dark Gray, Light Gray and Wood options in the current kit selectors.
Assembly fastenersStainless steel self-drilling screws supplied with the selected kit; wall anchors are selected separately.
Site-dependent specificationsAnchor type, embedment, wall reinforcement, edge distances, wind capacity and installation height must be established for the actual project.
Dimensions and tolerancesNominal component dimensions. Measure actual parts and the completed wall before fabrication.

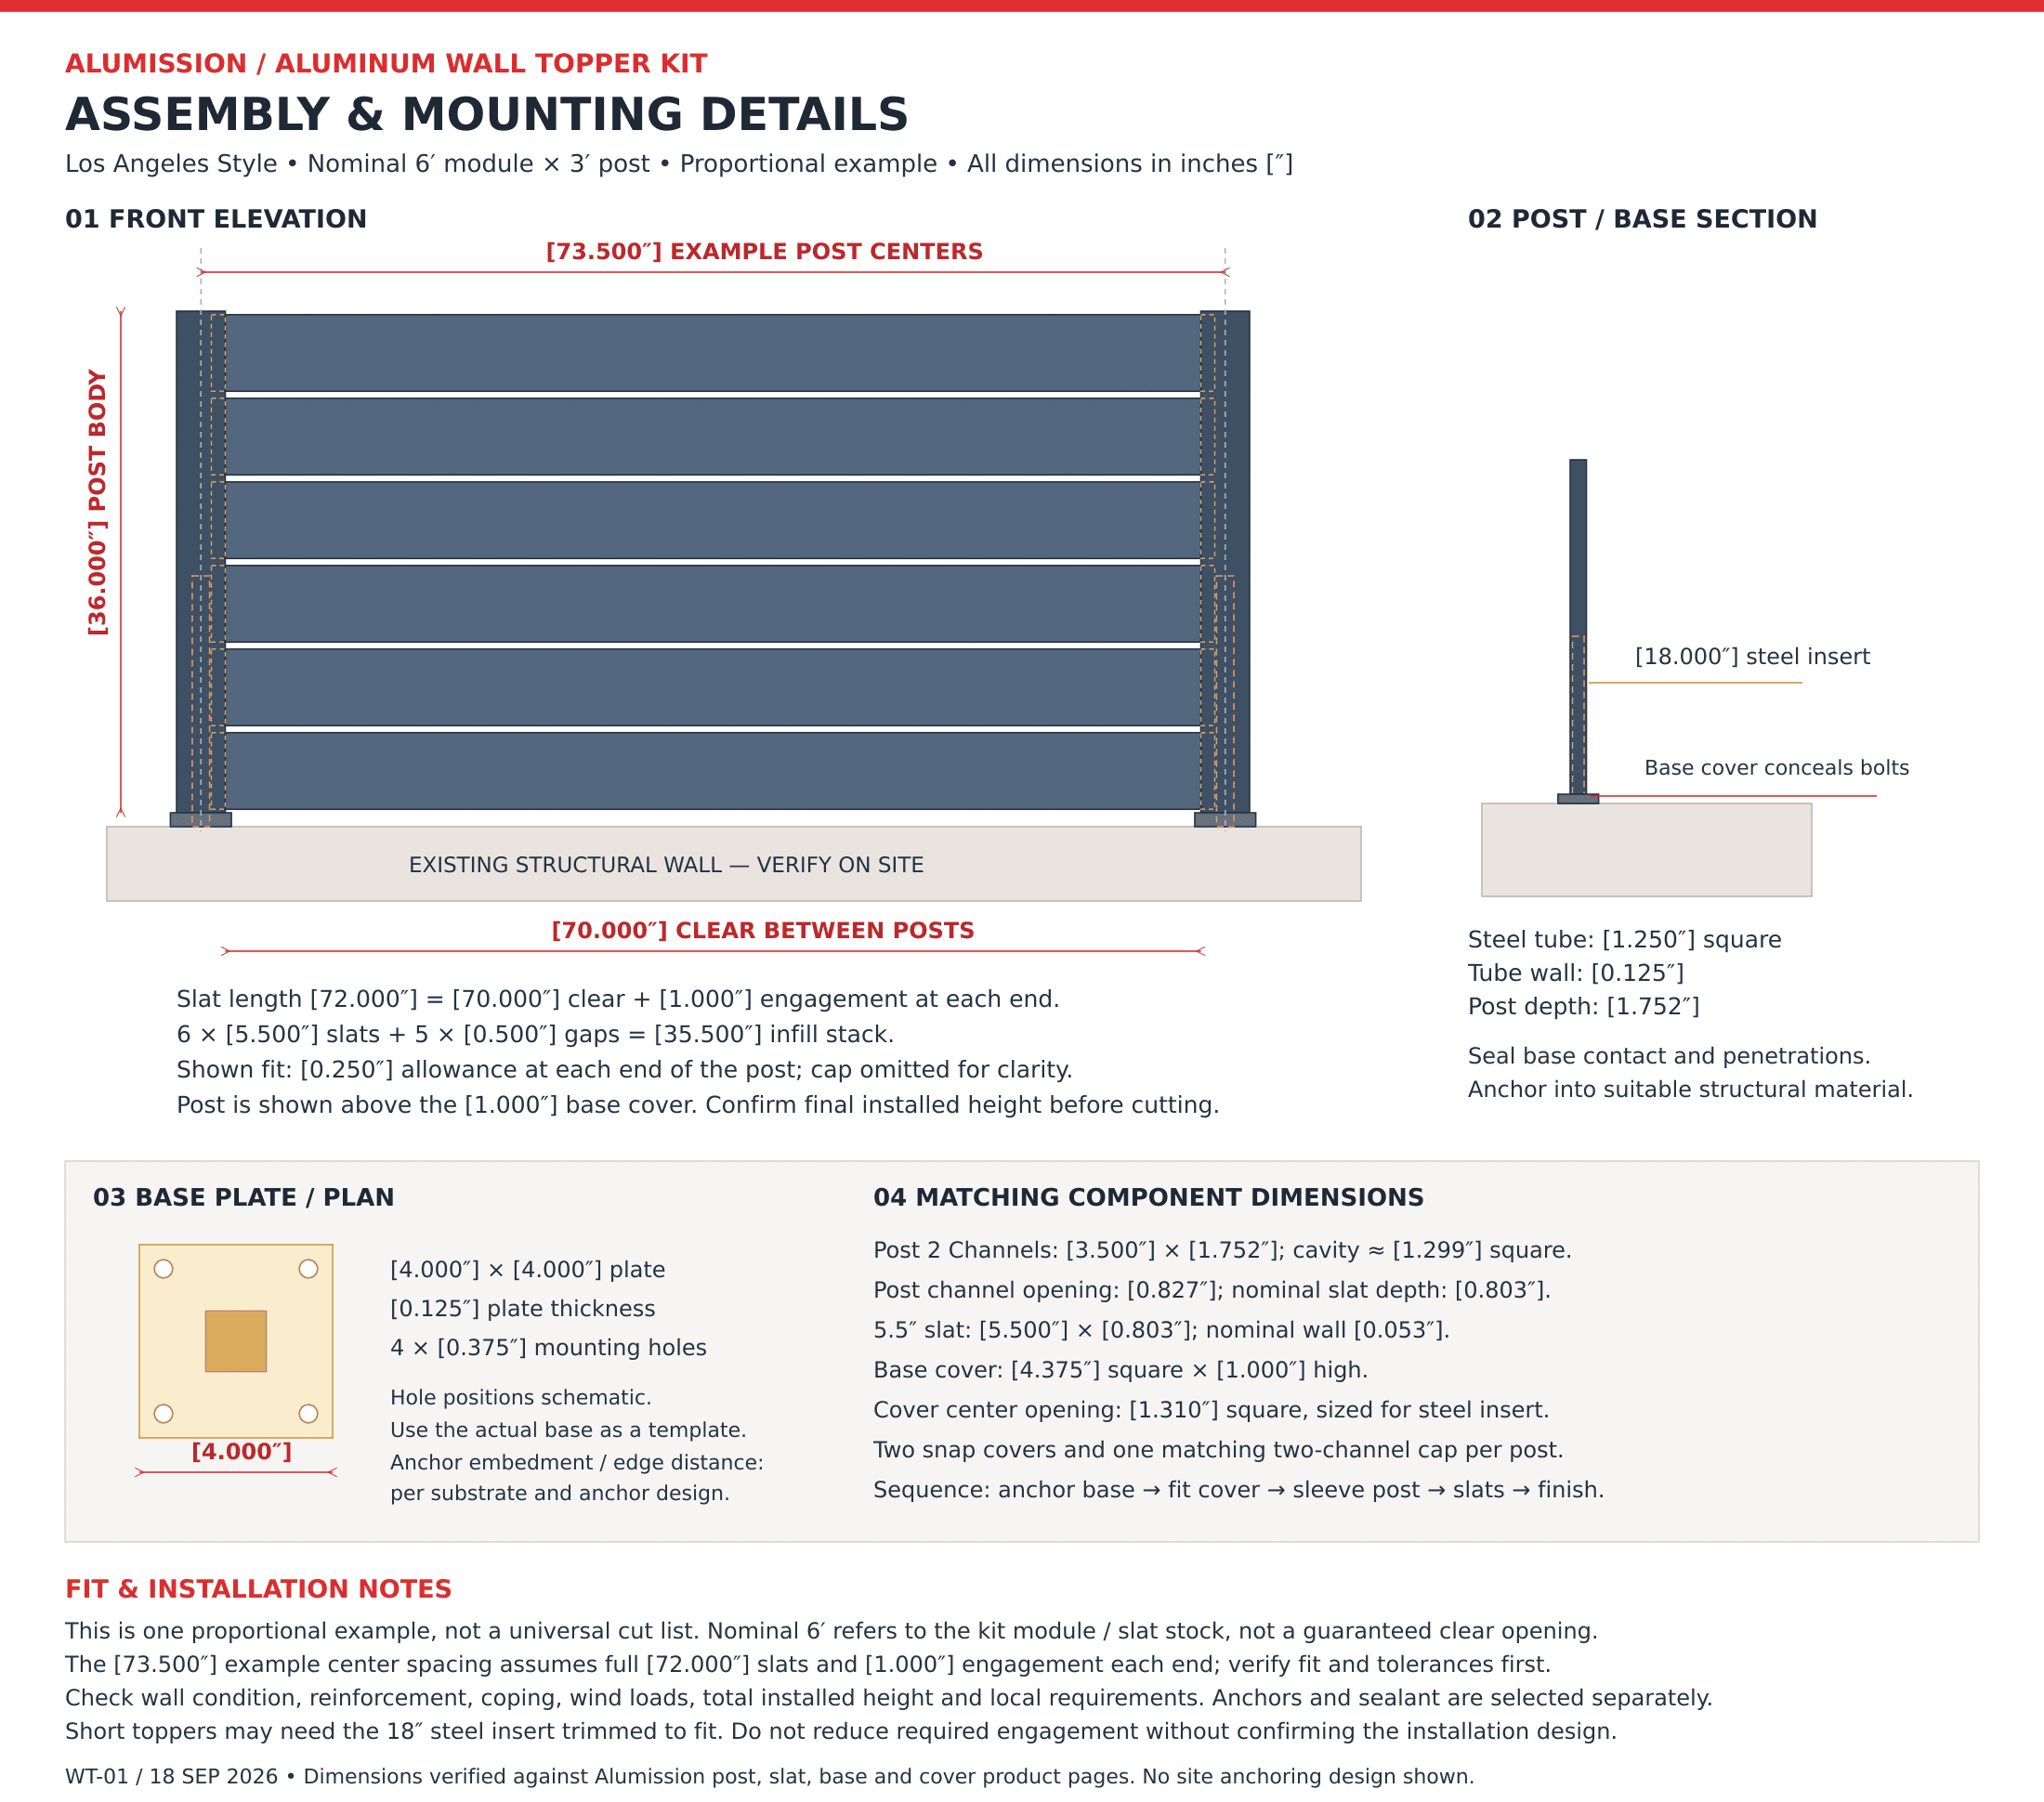
Detailed wall topper shop drawing

Detailed aluminum wall topper assembly drawing showing proportional Los Angeles slats, post dimensions, steel base section and base plate mounting plan in inches
Los Angeles Style example: six 5.5″ slats and five ½″ gaps form a 35.5″ infill stack inside a nominal 3′ post. The drawing separates slat length, clear opening and post centers, and shows the base-cover allowance. Other styles require their own infill schedule.
Open Full-Size Shop Drawing →

Mount into structural support

A decorative wall cap, thin veneer or hollow block face should not be assumed to provide adequate anchorage. Check the actual wall construction and establish anchor spacing, embedment and edge distances before drilling.

Confirm the final height

Allow for the base cover and cap as well as the post and infill. The example drawing shows a 36″ post above a 1″ base cover; it does not label that assembly as exactly 36″ above the wall.

Q&A

Aluminum wall topper questions, answered.

Explore sizing, privacy, mounting, wall suitability and maintenance before you choose your kit.

Choosing your wall topper

What is an aluminum wall topper?

A post-and-slat extension installed above an existing suitable wall. It adds screening and a finished architectural edge without replacing the entire wall.

What does a wall topper look like?

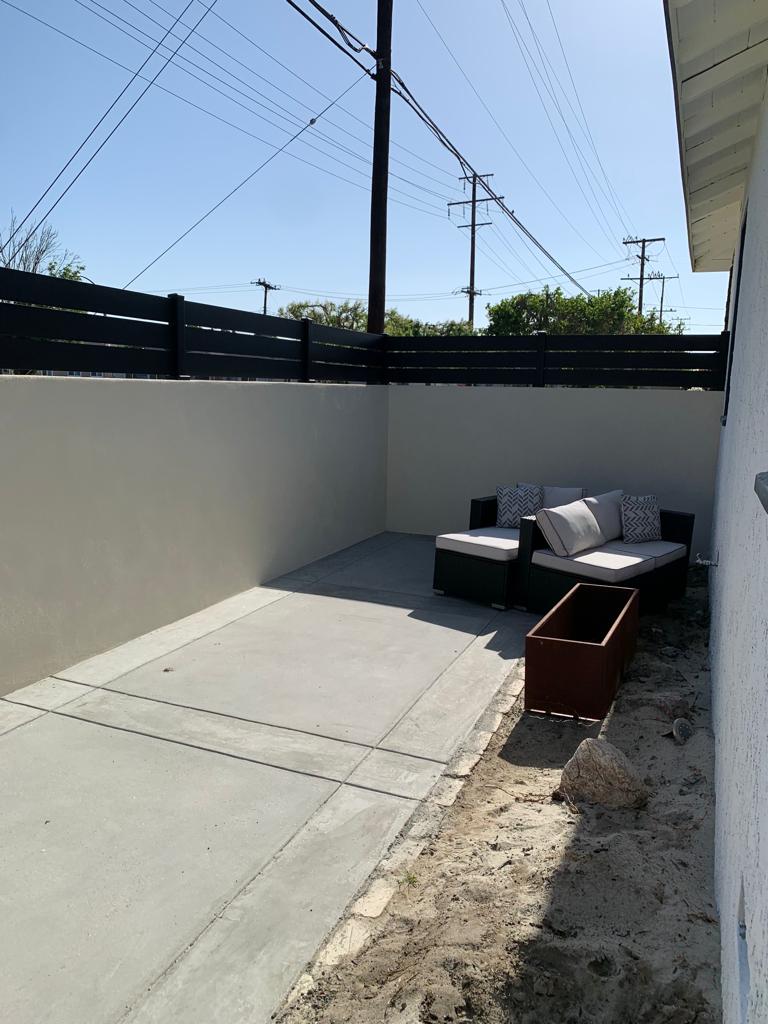
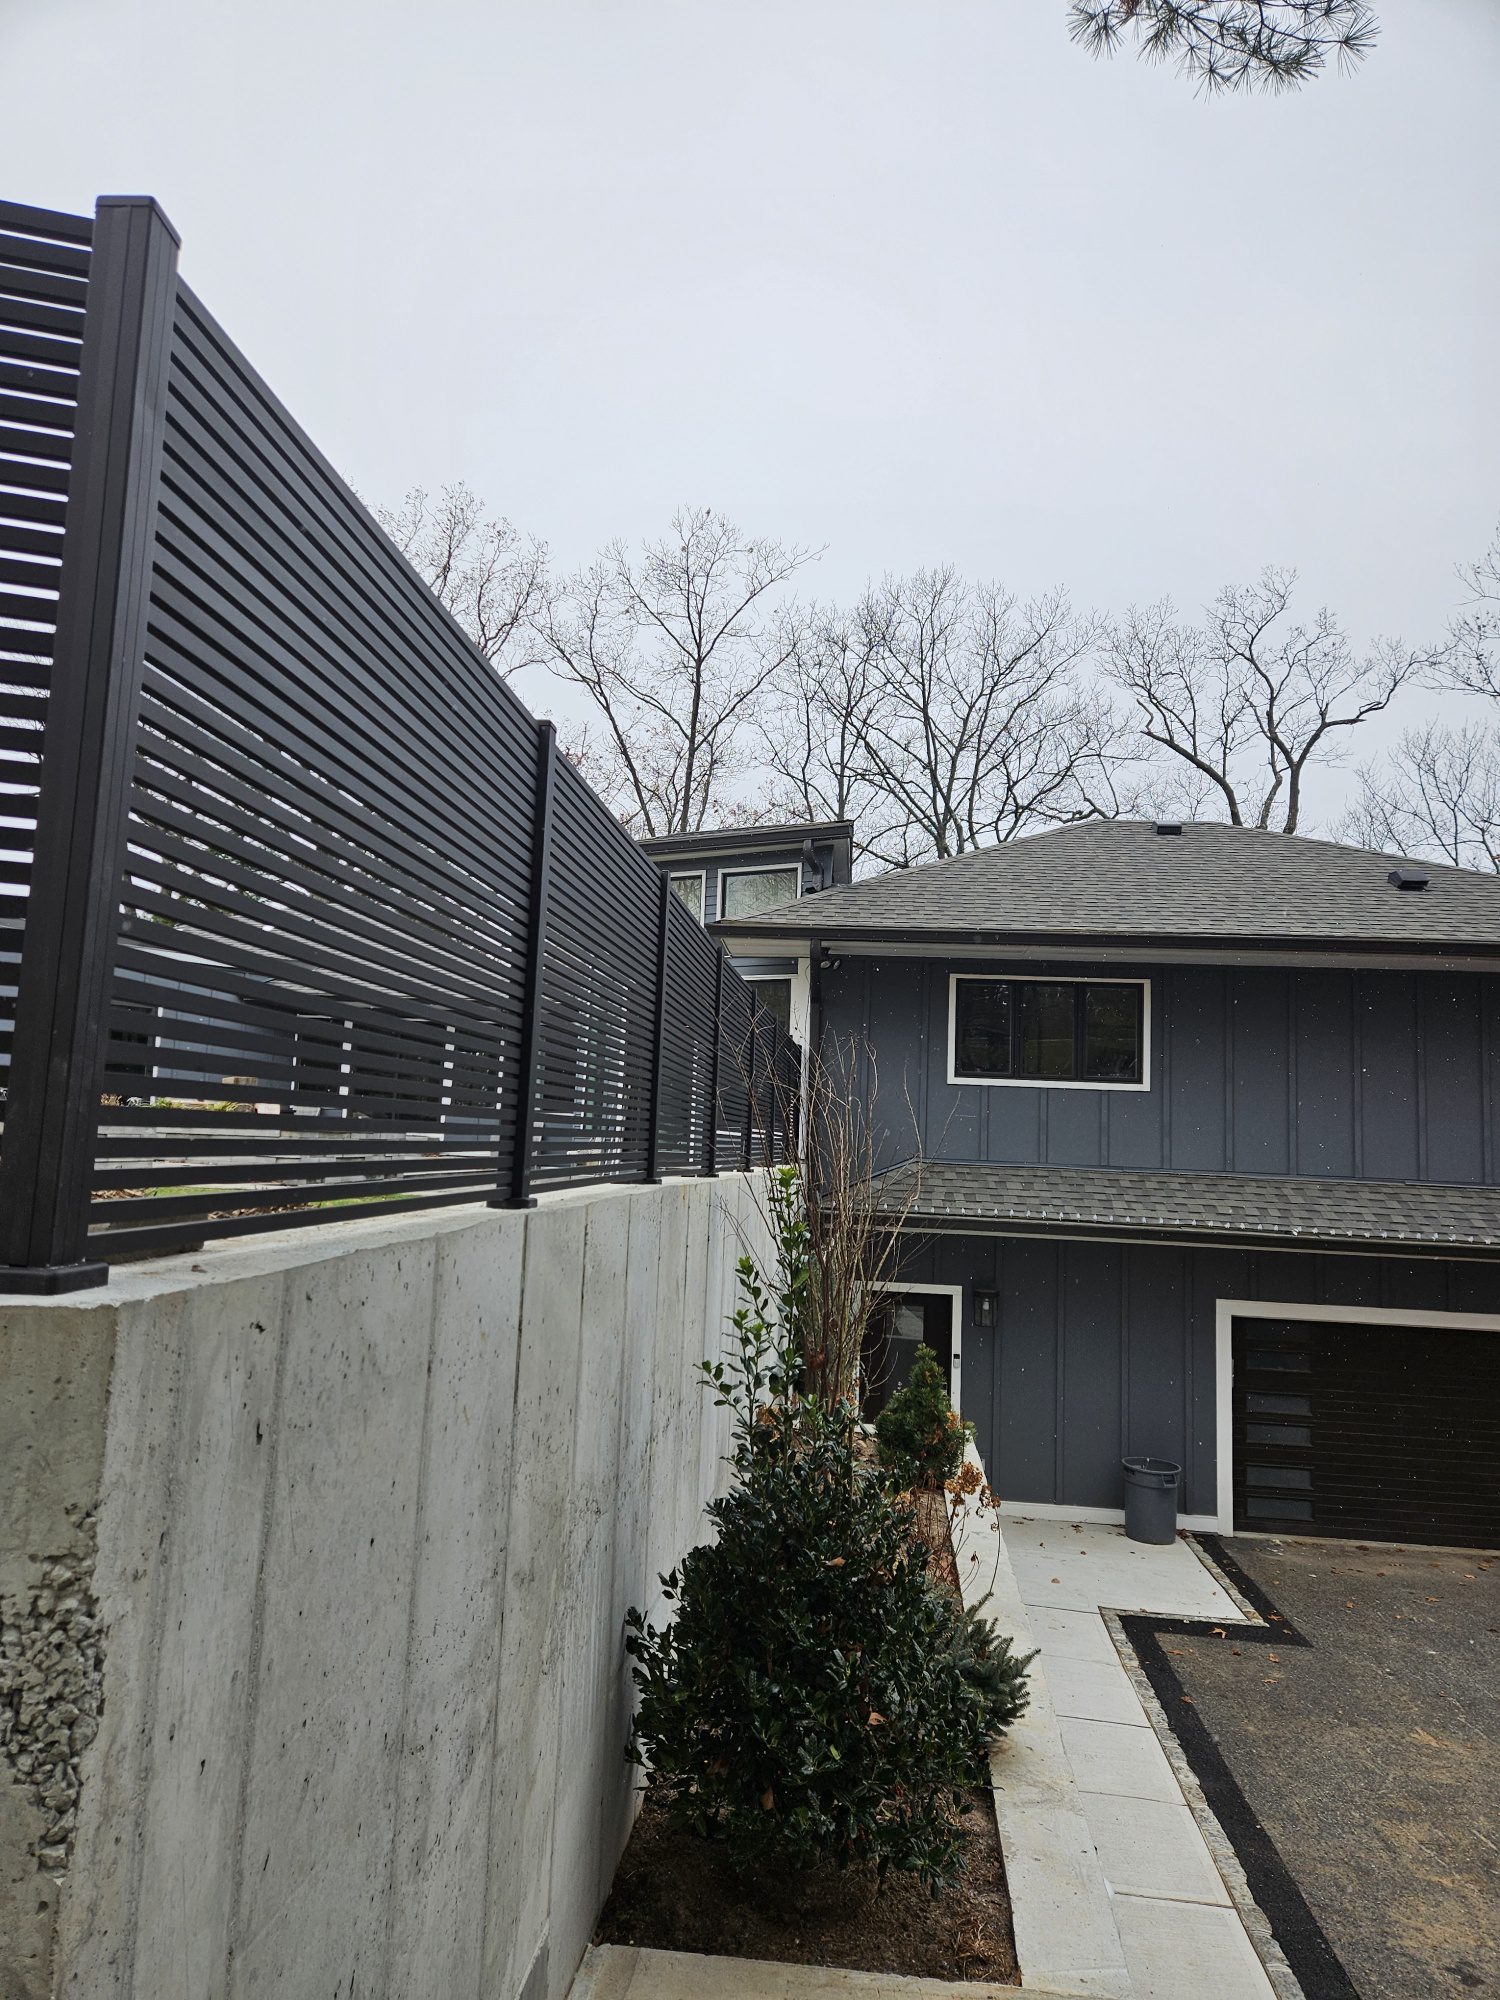
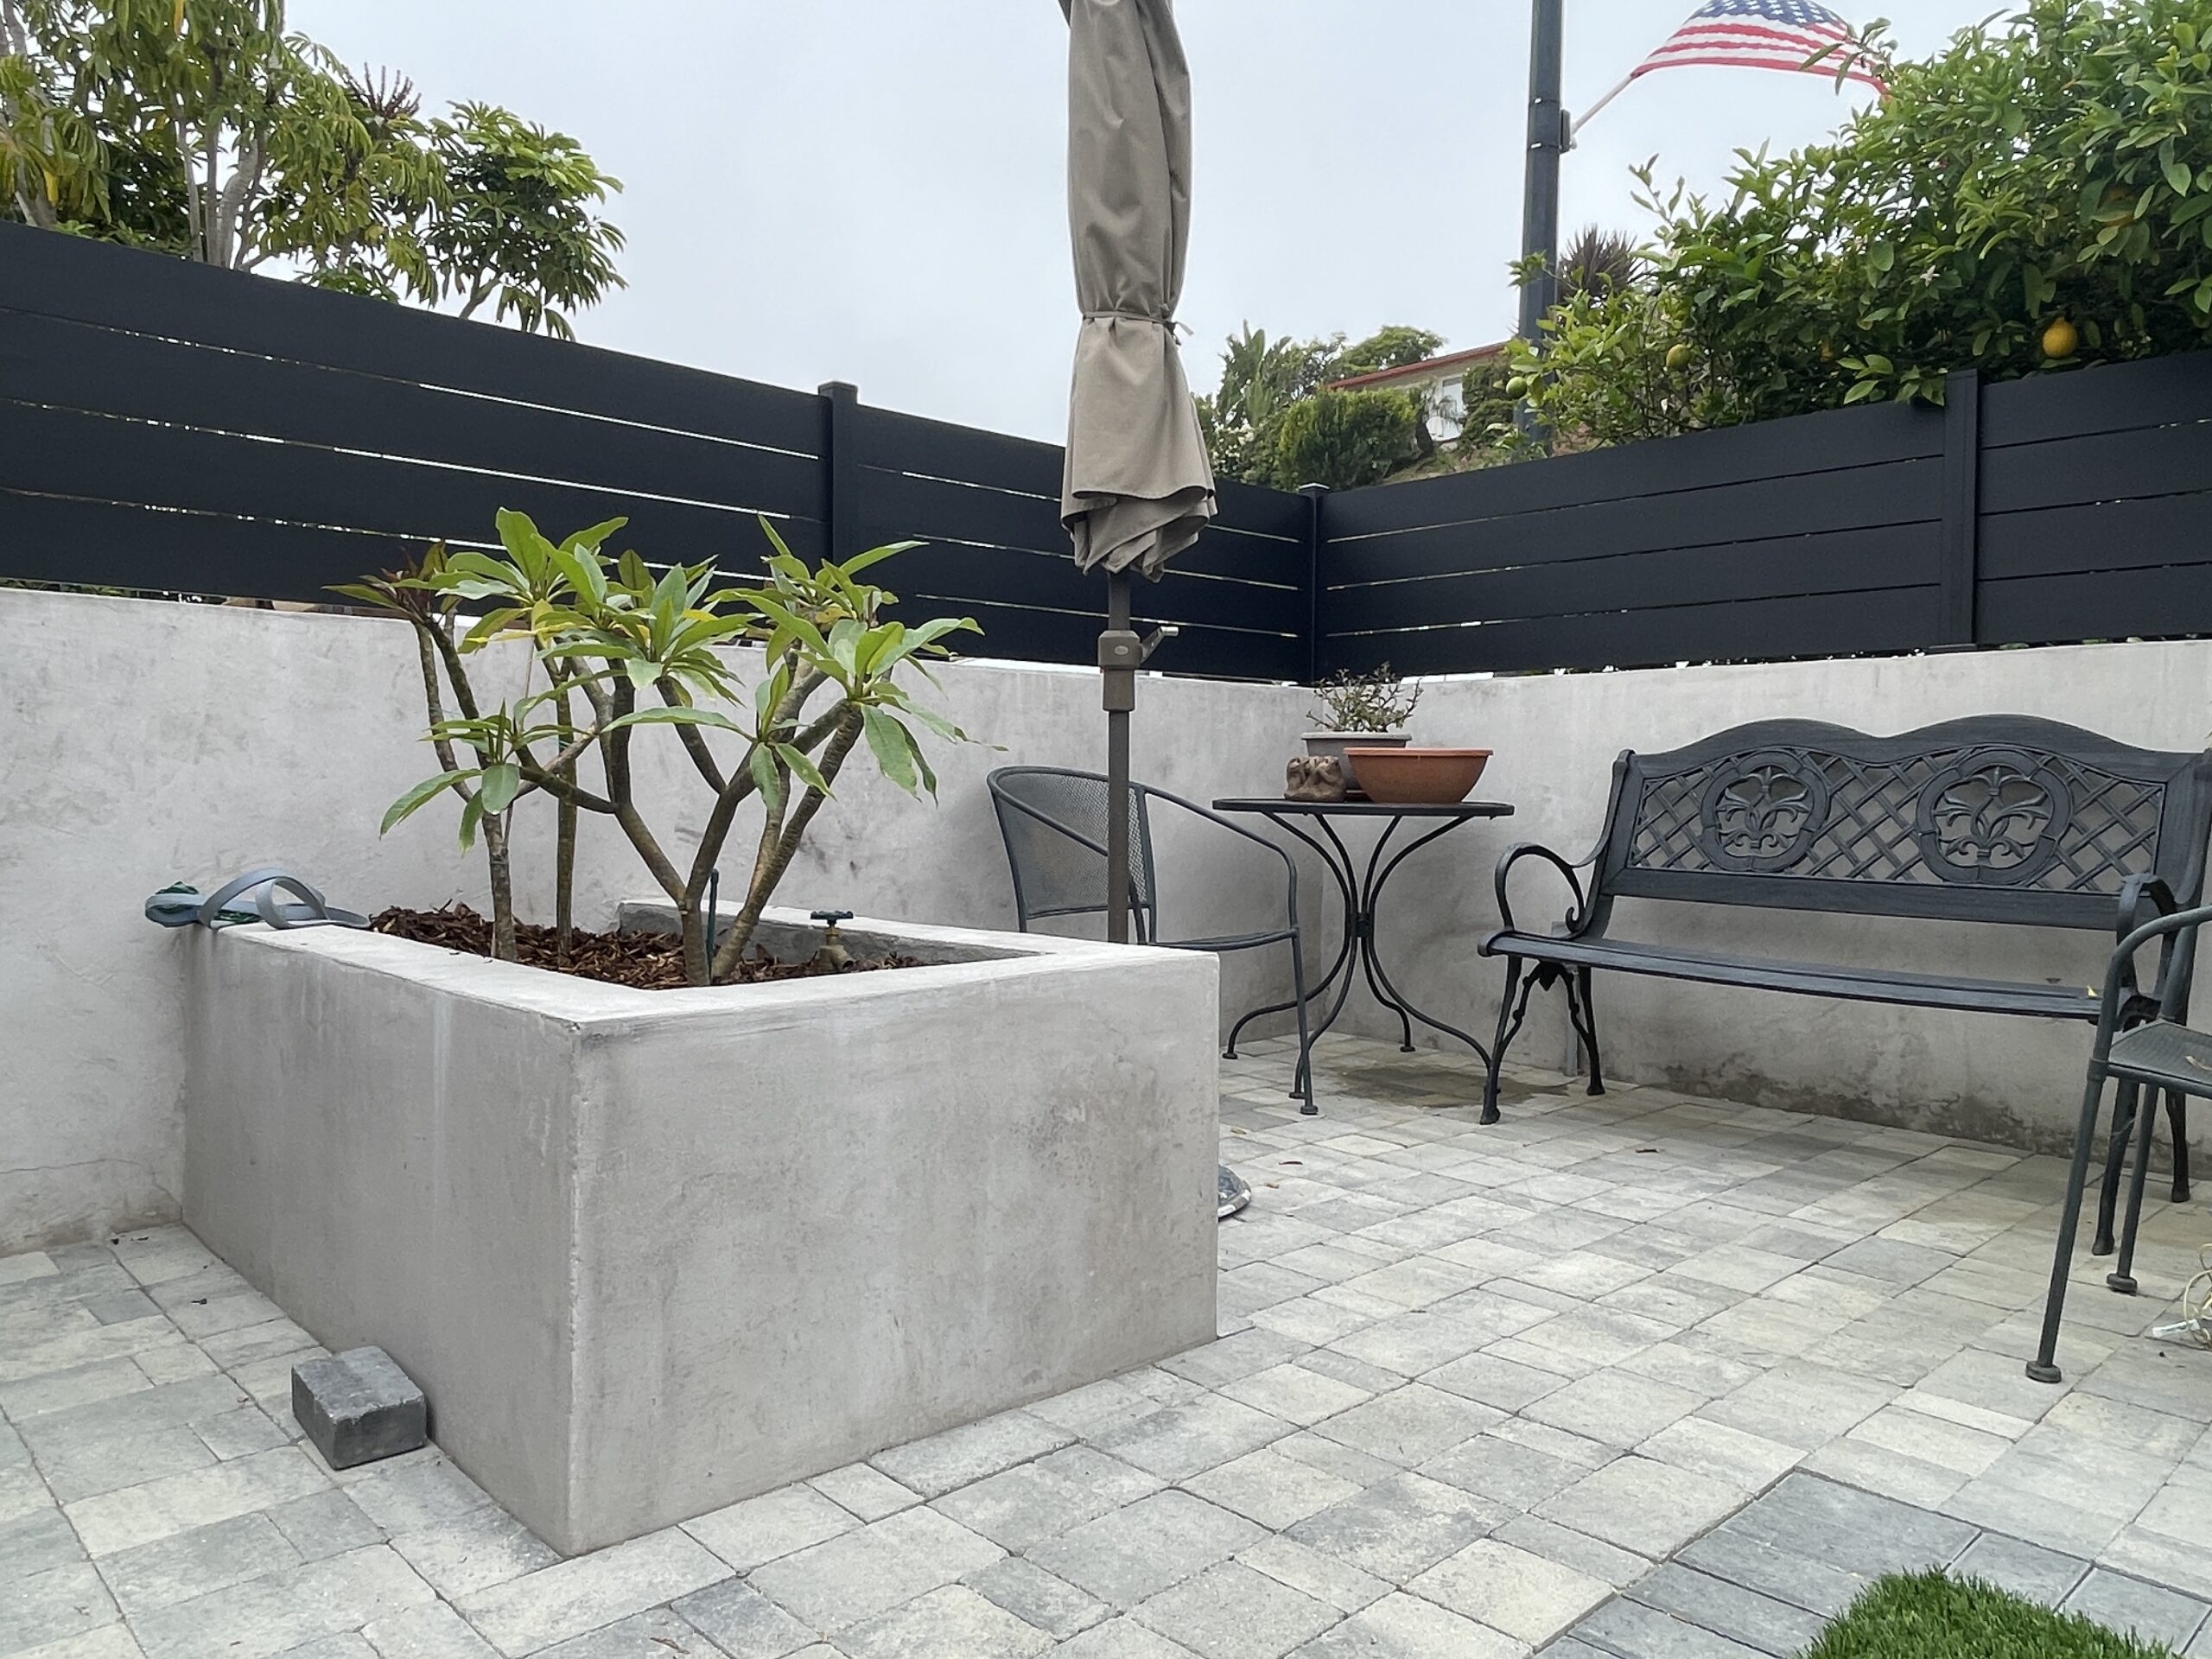
Alumission wall toppers use horizontal powder-coated slats between aluminum posts. Choose broad slats, narrow slats, an accent-band pattern or a no-intentional-gap privacy design. The completed projects above show real installations.

How is a wall topper different from a fence?

A wall topper relies on an existing structural wall for its mounting foundation. A freestanding fence typically has posts supported independently in the ground or on a designed foundation.

Which style offers the most privacy?

New York Style has tightly stacked slats without an intentional view-through gap. Los Angeles, Dallas, Miami and San Francisco use spaced patterns. Consider viewing angle and neighboring window heights when choosing.

Will it completely block a neighbor’s view?

Coverage depends on the style, combined wall-and-topper height, distance and viewing angle. A no-gap style screens through the panel, but cannot block sightlines over the top. Measure the sightline you want to screen.

Can I match an Alumission gate or fence?

Choose a coordinated style and finish from the available kit selections. Check the slat pattern and proportions as well as color, especially when matching an older installation.

Which colors are available?

The selectors currently offer Black, Bronze, White, Dark Gray, Light Gray and Wood. Check the selected product’s available combination before ordering. Screen colors can differ from the physical finish.

Is the wood-look option made from wood?

No. The Wood option is an aluminum system with a wood-look finish. It combines the visual character of wood with aluminum components.

Sizes, quantities and ordering

What heights can I order?

Choose nominal heights of 1′, 1½′, 2′, 2½′, 3′, 3½′ or 4′. Confirm the final installed height with the base cover, cap and slat arrangement before setting out posts.

What lengths are available?

The selectors offer nominal runs from 6′ through 96′ in 6′ increments. Individual 6′ slat sections are supported by intermediate posts.

Is a 6′ module the same as a 6′ clear opening?

No. Module length, slat stock length, post centers and clear opening are different measurements. Slat engagement inside the channels affects the layout. Confirm the actual components and tolerances before cutting.

How many posts do I need?

For a straight continuous run of complete modules, use one post per 6′ module plus a final end post. A nominal 24′ run has four modules and five posts. Corners, separate runs and level changes need their own layout.

Can I shorten the final section?

Yes. Use suitable aluminum-cutting equipment, measure the actual channel fit, support the material and deburr cut edges before assembly. Check the required end engagement before cutting.

What is included?

The product schedules list two-channel posts, two covers and a cap per post, an 18″ steel base and aluminum base cover per post, style-specific slats and spacers, and stainless steel assembly screws. Quantities depend on height and length.

Are wall anchors and silicone included?

No. Current kit pages exclude wall anchors, sealant, tools, drill bits and structural engineering. Select mounting hardware for the actual wall and loads.

How much does a wall topper cost?

Select style, height, run length and finish on the product page for the current combination price. Allow separately for wall preparation, anchors and installation.

Is shipping included?

Wall topper products are listed with FREE SHIPPING. Check the selected product’s fulfillment information and checkout details when ordering.

Can I return a kit after cutting or installing it?

Review the current Return & Refund Policy before modifying components. Cutting or installation can affect eligibility. Inspect the delivery and confirm the layout before fabrication.

Wall suitability and installation

Can I install it on a concrete or block wall?

A suitable concrete or masonry wall may support a topper, but condition, reinforcement, thickness and anchor locations must be checked. Attach to structural material using a design appropriate for the wall and topper.

Can I put an aluminum fence on top of a retaining wall?

Only after confirming the retaining wall and foundation can resist the added loads. Retaining-wall caps alone are not a mounting design. Have the structure and anchorage evaluated before choosing the post layout.

Can the bases attach to hollow concrete blocks?

Do not assume a hollow block face can support the loads. The anchor system must suit the construction, which may require reinforced or grouted cells or another designed mounting solution.

Can I anchor only into the coping or wall cap?

Do not rely on a decorative or loosely bonded cap. Confirm how the connection transfers into sound structural material, and preserve waterproofing and drainage.

How wide must the wall be?

The steel plate is 4″ square and the cover is 4.375″ square. These footprints are not minimum structural wall widths. Anchor edge distances, coping geometry and construction may require wider support.

Which anchors should I use?

Use anchors rated for the substrate and required loads. Diameter, embedment, spacing, edge distance and torque depend on the anchor design. Slat-assembly screws are not masonry anchors.

How does the steel base fit the aluminum post?

The base’s 1¼″ square steel tube fits inside the two-channel post. Fit the aluminum base cover over the base before sleeving the post onto the tube, then secure the assembly as required.

What if the 18″ insert is taller than my short topper?

A shorter installation may require the insert to be trimmed. Confirm the required support length and post connection first; do not assume every height uses the same preparation.

Can I install it myself?

The system uses field-fit components and common measuring, cutting and drilling tools. Wall and anchor work require suitable experience. Use a qualified installer where the structure or mounting design is uncertain.

What tools do I need?

Plan for a tape measure, level, marking tools, drill/driver, appropriate bits, an aluminum-cutting saw and blade, a deburring tool and protective equipment. Masonry work may also require a hammer drill, hole-cleaning tools and a torque wrench.

How do the slats attach?

Set the posts plumb and confirm spacing. Slide slats into the channels, add the specified spacers, secure with compatible assembly screws, and finish with covers and caps.

Should the bottom slat touch the wall?

Follow the assembly and drainage details rather than forcing the slat against uneven coping. The drawing shows an example allowance, not a universal clearance.

Can it follow a stepped or sloping wall?

Plan each level section and its transitions separately. Do not assume horizontal-slat kits can rack to any slope without changes to the post and slat layout.

How should mounting points be waterproofed?

Use compatible sealant, such as silicone where suitable, at base-contact areas and penetrations. Preserve the wall’s waterproofing and drainage. Sealant does not replace proper anchorage.

Performance, permissions and care

Do I need a permit or HOA approval?

Requirements vary. Confirm the allowed combined wall-and-topper height, setbacks, ownership and HOA restrictions with the relevant authority before ordering. A standard kit size is not a permit approval.

Can I add a topper to a shared boundary wall?

Confirm wall ownership and the required permission before drilling or changing its height. Resolve the proposed design and installation access with the appropriate parties first.

How much wind can it withstand?

No single wind rating is established here for all heights, spans and walls. Performance depends on the entire assembly and support. Taller or more closed panels need particular attention to loading and anchorage.

Is this a balcony guard or pool safety fence?

Do not assume a wall topper is approved for either purpose. Guards and pool barriers have additional opening, height, climbability and load requirements. Verify a system for the specific application.

Will it rust, rot or attract termites?

Aluminum does not develop ordinary steel’s red rust or rot like wood. The kit also includes steel bases and metal fasteners, which should be inspected along with their protective finishes.

Does powder-coated aluminum need painting or staining?

Routine painting or staining is not normally needed. Clean with mild soap, water and a nonabrasive cloth. Avoid harsh chemicals and abrasive tools.

Can it be used near the coast?

Review exposure and maintenance needs for the entire assembly, including bases and anchors. Rinse accumulated salt and debris with fresh water, and inspect connections and damaged coating regularly.

Can I hang planters, lights or privacy fabric from it?

Extra items add weight and may increase wind loads. Check their effect on the posts, wall and anchors first. The topper is not a support for heavy equipment or a building structure.

Can a damaged slat be replaced?

Individual parts can be assessed for replacement. Access, removal sequence, dimensions and finish matching depend on the installation. Identify the style and measure the original component first.

What should I send Alumission for planning help?

Send wall photos, construction details, run length, wall-top width, desired added height, corners or steps, style, finish and project location. These help identify a suitable kit and mounting questions.

For return eligibility, see our Return & Refund Policy. For assembly guidance, visit How to Install Aluminum Fences.

Finish your wall with the right kit.

Choose a style and size, or send us your wall measurements and photos for help planning the order.

Shop Alumission aluminum wall topper kits to add height, privacy and a modern finish above suitable existing walls. Choose five slat styles, seven nominal heights from 1′ to 4′, and modular runs in 6′ increments. Explore completed wall topper projects, compare designs, and review detailed specifications, a shop drawing and installation questions below.

Related
Categories

Make room for a better entrance

Aluminum sliding driveway gates, designed around the way you arrive.

Modern horizontal lines. Sideways movement. A cut-to-fit kit with clear choices for style, size, finish and hardware.

Build an Alumission sliding driveway gate that suits your opening and leaves the driveway free of a swing arc. Compare the five styles, watch the assembly videos and plan the complete rolling path before you order.

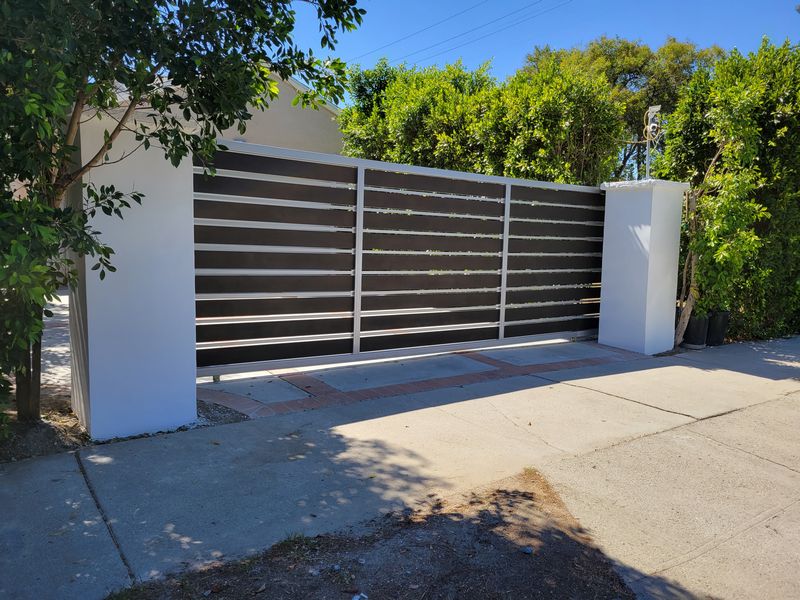
Real Alumission sliding driveway project · Whittier, California. Site installation and gate operator shown are separate from the kit.

5 styles

Modern horizontal gate designs

9 sizes

Opening width × height options

6 finishes

Including Wood slats with Black framing

2 selections

No Hardware or Add Hardware

Watch before you build

Three videos to help plan your sliding gate.

See the assembly, corner construction and one motor-installation example in the three Alumission videos below. Watch the whole relevant guide before starting the corresponding work.

Complete sliding gate assembly

Start here to see the Alumission framed sliding leaf assembled. Review measuring, frame layout and slat fitting before cutting; site track installation is a separate stage.

LiftMaster RSL12UL motor installation

Watch the demonstrated operator installation and chain arrangement. Use the current manufacturer instructions and an installer’s assessment for your own gate. Motor and automation equipment are separate.

Framed gate miter joints · no welding

Take a closer look at the mechanically assembled frame corners. Use this corner-detail video alongside the complete sliding gate guide and the instructions for your selected kit.

Continue with the illustrated sliding gate assembly guide for the matching system. Video dimensions describe the demonstrated layout; confirm your gate and hardware before making cuts.

Find your signature look

Compare five aluminum sliding gate kit styles.

Choose the slat pattern for your home, then select the opening-width group, height, finish and hardware. The current product galleries and variation lists show the actual sliding kit configuration.

Broad horizontal lines

Los Angeles style

An evenly spaced broad-slat look, using 5.5″ aluminum slats and 1/2″ spacers.

Privacy-focused

New York style

A close-set 5.5″ slat pattern for stronger visual screening.

Mixed-width detail

Dallas style

A distinctive arrangement of 5.5″ and 1″ horizontal slats.

Modern mixed pattern

Miami style

Broad and narrow slats arranged in the Miami style.

Fine horizontal detail

San Francisco style

A finer profile combination, including the 2.5″ slats listed for the sliding kit.

Opening widths & heights

Choose openings up to 12′, 16′ or 20′ wide, each at 4′, 5′ or 6′ high. These are opening groups for a cut-to-fit kit. Account for the complete leaf length, tail and site hardware when planning.

Colors & Wood finish

Choose Black, Bronze, White, Dark Grey, Light Gray or Wood. Wood-look aluminum slats use Black framing and components. The San Francisco sliding Wood kit also uses Black 2.5″ slats alongside its Wood 1″ slats.

Choose privacy thoughtfully. New York’s close-set pattern provides more visual screening; spaced designs create a more open rhythm. Consider viewing angles, working gaps, wind exposure and the surrounding boundary along with appearance.

Understand your order

What comes with your sliding driveway gate kit?

Each variation lists the components for its selected style, size, finish and hardware option. Frame stock lengths, slat quantities and extension parts vary. Open a product and make your selection to see the exact included-items table below the gallery and purchase area.

Included with either selection

  • Aluminum two-channel frame profiles and center members
  • Selected slats and applicable spacers
  • Frame covers, post covers and caps
  • Applicable galvanized steel extension inserts
  • Assembly screws and four corner L braces
  • V-groove sliding gate wheels

Added with Add Hardware

  • Listed 8′ stainless-steel V-track sections
  • One gate catcher
  • One dual-roller guide assembly
  • One set of two motor-chain attachment brackets

The standard package lists two track sections for the up-to-12′ and up-to-16′ groups and four for the up-to-20′ group. Check the full travel and site requirements for any additional track.

Arrange separately

The operator, drive chain, controls, power supply and safety devices are separate. Also plan structural supports, foundations, site-specific mounting work, tools and installation labor.

No Hardware requires compatible track, guidance and stopping provisions from your existing system or a separate purchase.

Wheels stay included with No Hardware. That selection excludes the optional track package, not the rolling wheels. Add Hardware includes the listed package in the selected variation price; it is not an automatic opener package.

Real sliding gate installations

Sliding driveway gate project gallery.

See completed Alumission sliding entrances in different settings. Project photos may show custom patterns, mixed finishes, surrounding fences and automation. Those site-specific details are inspiration and may differ from the standard kit you select.

Sliding driveway project

Portland, Oregon

See a custom sliding driveway entrance with mixed finishes and infill. This custom design differs from the five standard kits.

Sliding driveway project

Whittier, California

See a black sliding driveway gate and its relationship to the brick drive and boundary.

Sliding driveway project

La Jolla, California

Explore a Los Angeles style sliding gate with broad horizontal slats and matching surrounding work.

Sliding driveway project

Boston, Massachusetts

View a completed horizontal aluminum sliding gate in an urban entrance.

Sliding driveway project

Los Angeles, California

See the gate leaf during on-site assembly. This project also uses a solar-powered operator, separate from the standard kit.

Sliding driveway project

Van Nuys, California

Explore a custom two-color Miami style sliding gate. The combination shown is project-specific.

Customer feedback

A customer review from the sliding gate collection.

★★★★★

“Fantastic product!”

Maya Thompson
Review posted on the Miami sliding gate kit product page · October 1, 2026

Plan your own project with support

Have questions about the opening, full gate length or hardware? Send your measurements and photos to Alumission. Include the runback area and the motor details if you are reusing existing equipment.

Get help planning a sliding gate →

Measure the whole path

Plan the opening, runback and rolling hardware.

A sliding driveway gate moves beside the opening. It saves the swing arc, but it still needs a clear route and a stable track installation for the complete leaf. Start with a drawing of both the closed and fully open positions.

01 · Measure the vehicle opening

Record the finished clear width, desired height and vehicle approach. Check columns, boundaries and any turn immediately before the entrance. Choose a kit group that covers the proposed opening after confirming the installation layout.

02 · Allow for the complete leaf

The demonstrated frame uses the measured opening plus a 24″ tail. That full leaf must fit beside the driveway when open. Add the actual guide, stopping and operator clearances rather than planning from the opening width alone.

03 · Check the whole track route

Inspect ground levels, rail support and drainage along the full travel. Include the runback area, not just the road opening. Ask your installer to review a slope or unstable paving before ordering hardware.

Tracked sliding kit or cantilever system?

This kit is designed around V-groove wheels and ground V-track. A trackless cantilever gate uses a different support system and structural design. The standard sliding kit and its tail should not be treated as a cantilever package.

Sliding gate or double swing gate?

Compare the available sideways runback with the swing arcs needed by two leaves. A short driveway may favor sliding movement if there is enough side space and a suitable track route. If side space is limited, review the double swing driveway gate kits.

Manual today, automation planned

Choose the operating system for the finished gate.

Manual operation and automation both start with a gate that rolls freely, stays guided and stops in the intended positions. Plan equipment and protective provisions for the complete installation.

Plan the mechanical installation

Confirm the wheel-and-track match, guide arrangement, receiver, stops and how the leaf is secured. The full path should be clear of rubbing and binding before an operator is added.

Match the gate operator

Provide the installer with the finished gate dimensions and weight, expected usage and site conditions. Discuss chain or drive attachment, mounting space, power and any solar or battery options.

Plan access & protection

Choose compatible remotes, keypad or phone control with the installer. Confirm manual release and the operator’s required protective devices, and provide a suitable separate route for pedestrians.

For equipment-specific guidance, see Nice’s sliding gate FAQs and LiftMaster’s residential operator buyer’s guide. Follow the current instructions for the equipment selected for your site.

A clear path to ordering

Choose your kit, then check every included item.

The live product selection is the place to confirm your current price. Each variation is priced from the individual components required for the selected style, catalog size, finish and hardware choice.

Select your variation

Choose a style, opening group, height and finish. Then select No Hardware or Add Hardware. Cutting to a smaller final opening does not change the selected kit’s supplied contents or price.

Review the packing list

The included-items table lists names, details, supplied lengths and quantities for that variation. Check it against your site plan so you know what arrives and which installation parts you will provide separately.

Prepare to build

Watch the complete assembly guide and review the correct cutting plan. Arrange a protected work area, suitable tools, support preparation and installation help. Check delivered components before making irreversible cuts.

Practical answers by topic

Sliding gate Q&A: 48 questions to help you plan.

Browse the topics below for answers about sizing, side clearance, slopes, V-track, contents, assembly, finishes, motors, ordering and care.

48 questions across 8 topics

Sizes & side clearance

Choose an opening-width group up to 12′, 16′ or 20′, with a 4′, 5′ or 6′ height. Each of the five styles has six finish options and two hardware selections. Confirm the complete gate layout and available runback before choosing your variation.

The size selector refers to the opening-width group. The complete leaf also needs its tail. In the demonstrated Alumission assembly, the horizontal frame is cut to the measured opening plus 24″. Do not use the opening width alone as the finished leaf length.

Allow unobstructed runback for the complete assembled leaf, including its tail, plus the actual guide, stops, receiver and operator arrangement. Measure the entire travel path. Do not apply a generic percentage or a cantilever clearance formula to this wheeled kit.

Record the clear vehicle opening, desired finished height, side runback distance and ground levels across the entire rolling path. Note columns, walls, obstructions, drainage, vehicle approach and the intended opening direction. Send photos with the measurements for project guidance.

Yes. The profiles and slats are cut during assembly. Choose a width group and height with enough material for the complete design. Confirm the cutting plan before starting; cutting a kit smaller does not reduce the selected variation’s price.

Plan the direction around the available runback and the positions of guides, receiver, stops and any operator. Do not assume the site works equally well in both directions. Confirm the final layout and hardware arrangement before assembly.

Track, slopes & site preparation

This Alumission kit uses V-groove wheels with compatible ground V-track. The optional Add Hardware selection supplies the listed track package. No Hardware leaves you to provide compatible track, guides and other required site hardware; it does not make the gate trackless.

No. It is a ground-supported wheel-and-track system. A cantilever gate uses a different support arrangement and structural design. The 24″ tail shown in the assembly video is not a cantilever conversion or a substitute for cantilever hardware.

The grade where cars travel and the grade along the gate’s rolling path are different issues. A rising approach may leave space for sideways movement, but the complete track route still needs review for alignment, clearance, support and safe control. Send slope details before ordering.

The rail needs a stable, suitable foundation and the correct anchoring. Loose gravel is not a structural base, and existing paving is not automatically adequate. Ask the installer to specify the support and fixing method for the actual surface and site.

Plan track coverage from the closed position through the full open travel, supporting the wheels throughout. Confirm the track length, joints, stopping positions and anchoring in the site layout. Compare that requirement with the supplied package; extra track may be needed.

Keep the rail and wheel path clear and plan where water will drain. Gravel, leaves, mud and ice can interfere with rolling. Include access for cleaning and inspect the full track after storms or unusual ground movement before operating a binding gate.

Kit contents & hardware choices

The selected variation supplies the aluminum frame components, style-specific slats and spacers, covers, caps, applicable steel extension inserts, assembly fasteners, four corner braces and V-groove wheels. Exact supplied lengths and quantities appear in the product’s variation-specific included-items table.

Yes. The V-groove wheels remain included with both No Hardware and Add Hardware. The No Hardware option excludes the optional track, catcher, guide and motor-chain bracket package. It is intended for a project where compatible required site hardware will be provided separately.

It adds the listed 8′ stainless-steel V-track sections, one gate catcher, one dual-roller guide assembly and one set of two motor-chain attachment brackets. The current standard package lists two track sections for up-to-12′ and up-to-16′ groups and four for the up-to-20′ group. Check the selected packing list and site requirements.

No. The motor-chain attachment brackets are connection parts, not a motor or a complete drive system. The operator, drive chain, controls, power supply, safety devices and installation are separate. Confirm the automation plan with the selected operator’s installer.

Open a style, then select size, finish and hardware. The included-items table below the gallery and purchase area updates to show that variation’s item names, details, supplied lengths and quantities. Review it before placing the order and again when checking delivery.

Only after compatibility and condition have been checked for the completed gate. Compare wheel and rail geometry, guide clearances, stopping arrangements and operator requirements. Reusing parts should not be assumed from their appearance or from the old gate’s opening width.

Frame construction & assembly

Alumission Aluminum Post 2 Channels forms the horizontal and vertical frame members. Center members divide the leaf into slat bays. Covers close the channels, while the selected style determines the slat arrangement and spacers. Review the component list for your size.

The demonstrated kit is mechanically assembled with screws, corner braces and steel inserts at applicable extension joints. Field welding is not part of that assembly method. Accurate cutting, drilling, squaring and fastening are still necessary.

The top, bottom, end and center members capture the slats and form the leaf assembly. Use the full frame arrangement specified for the sliding system. A pedestrian gate assembly or an unframed fence panel is not an interchangeable sliding leaf.

It is the additional rear portion included in the demonstrated horizontal-frame layout. The video adds 24″ to the measured opening. Include that full length when planning the leaf, available stock and runback, and confirm the chosen installation before cutting.

Where the selected size requires extensions, the system uses galvanized square steel inserts and #12 screws. Follow the engagement and fastening details for the supplied system. Do not place an improvised splice wherever material happens to end.

Start with the complete sliding gate assembly guide. Use the miter-joint video for a closer view of framed corner construction. Watch the LiftMaster RSL12UL video when planning that specific operator; it does not establish compatibility with every gate or replace its current manual.

Styles, privacy & finishes

New York uses a close-set broad-slat pattern for stronger visual screening. Los Angeles, Dallas, Miami and San Francisco provide their own horizontal patterns and spacing. Compare the selected product images and consider the viewing angle, perimeter gaps and site exposure.

Los Angeles emphasizes broad 5.5″ horizontal slats; New York uses a close-set broad-slat pattern; Dallas and Miami use distinct mixed-width arrangements. San Francisco combines finer profiles, including the 2.5″ components listed for this sliding kit. Use the actual sliding product gallery rather than a swing-gate photo to confirm the pattern.

Choose Black, Bronze, White, Dark Grey, Light Gray or Wood. The variation image and item list show the selected combination. Screens and lighting can change how a finish appears, so ask about a physical finish reference if matching existing materials is important.

No. It is a wood-look finish on aluminum slats. Wood kits pair those slats with a Black frame and components. For the San Francisco sliding kit, the 2.5″ slats are Black and the 1″ slats use the Wood finish.

Materials and finishes vary by component. Some rolling and fixing parts are stainless steel or galvanized, and the guide uses nylon rollers. Wood kits use Black components alongside the Wood slats. Check the item details for the selected variation rather than expecting every part to share one finish.

Coordinate the style, height and finish, then check slat alignment and the different frame and operating gaps. Matching surrounding work is separate from the sliding gate kit. Send a site photo or drawing when planning a coordinated entrance.

Motors, controls & safe operation

A properly installed wheel-and-track gate can be planned for manual operation. It still needs suitable guidance, stops, a receiver or catcher and an appropriate securing arrangement. Ensure the leaf moves freely and is controlled through its full travel.

Yes, subject to a suitable complete gate and site design. Plan operator location, chain or drive arrangement, power, guides, stops and protective devices early. Have a qualified gate-automation installer confirm the finished leaf and system before choosing equipment.

Match the operator to the gate type, completed length and weight, expected daily and hourly cycles, mounting geometry and environment. Discuss desired controls with the installer. A maximum weight rating or a demonstration video alone does not establish compatibility.

No. The video demonstrates one installation. Your selected size, finished gate, wind exposure, usage and site may call for another arrangement. Follow the current operator manual and have the installer check the complete application before purchasing.

These options depend on the chosen operator and compatible accessories. Solar capacity depends on available sunlight and usage. List the access methods you want before installation so power, charging, communications and backup access can be planned together.

Confirm the operator’s manual release, any battery backup and required entrapment protection with the installer. Keep the moving gate and runback area clear, and provide a separate suitable pedestrian route. Those accessories and site provisions are not included in the standard gate kit.

Prices, ordering & delivery planning

The current variation price is the total of the components required for its selected style, catalog size, finish and hardware option. Optional hardware is included in that displayed total only with Add Hardware. Use the live product selection for current pricing.

No. Pricing is based on the selected supplied kit and its components. Cutting the profiles to suit a smaller opening does not change that kit’s listed price. Choose the appropriate width group and height before ordering.

Budget for tools or assembly labor, foundations and track support, mounting work and any additional site hardware. Automation, power, controls and protective devices are separate. Review the order and checkout for shipping, tax and any other applicable charges.

No. These are cut-to-fit kits requiring assembly and site installation. Plan protected working space for long profiles, suitable tools and enough help to handle the leaf. Check delivered components against the selected variation before cutting or fitting.

Send the opening width, desired height, available runback, ground levels and photos of the entire entrance and sliding path. Include the style, finish, ZIP code, intended use and any existing hardware or motor details.

Contact Alumission to confirm suitability for the actual opening, traffic and project requirements. Frequent use, access control, supports and automation may change the design. Do not assume a residential kit selection establishes a commercial duty rating.

Care, troubleshooting & suitability

Wash the coated aluminum with mild soap, water and a soft cloth. Keep the track, wheels and guide area clear of debris. Periodically inspect connections, covers, brackets and stopping arrangements, following the hardware and operator manufacturers’ care instructions.

Possible causes include debris, rail misalignment, worn wheels, a rubbing guide or support movement. Stop forcing the gate and inspect the mechanical path first. An automatic operator should not be used to overpower a binding or damaged leaf.

Stop using it, keep people away and have the leaf secured and inspected by a suitable installer. Check the cause, including rail support, wheel condition, guides and stops, before returning it to operation. A heavy displaced leaf needs controlled handling.

Aluminum does not form ordinary steel’s red rust, but the finish and all hardware still need care. Discuss salt exposure before ordering, rinse accumulated salt with fresh water and inspect the full assembly. Do not treat coastal suitability as a maintenance-free guarantee.

Wind and added screening change loads on the complete assembly and guides. Do not add fabric or extra cladding without review. Pet containment also depends on slat, side and bottom gaps; assess the whole boundary for the intended use.

Check local height, setback, sight-line, access and permit requirements, together with any HOA rules, before ordering. Keep the full travel and waiting area within the approved layout. A listed kit size is not approval for a particular property.

Ready to plan your entrance?

Find the sliding driveway gate kit for your home.

Choose the horizontal style you like, then select the size, finish and hardware to see your exact kit price and included-items table. Send your opening and runback measurements if you would like help with the choice.

Fence and gate design

Proudly
Made in America

We proudly support the domestic economy and promote integrity and excellence with American-made products.
Alumission manufacturing is in-house and our entire selection of fence and gate aluminum profiles and parts, hardware,
locks, and access control items are crafted with precision to ensure the highest level of quality control. You can be
confident in your Alumission purchase that not only are you getting a quality product, but that your purchase is
supporting American businesses and industries. Shop with us for a great value and discover the reliability and brilliance
of Alumission American-made aluminum fences and gates.