ALUMISSION INSTALLATION GUIDE

How to install aluminum fence panels.

Build a clean horizontal fence between existing columns, pillars or structural posts. Follow the original installation video, a complete tool checklist and 10 illustrated steps—from measuring the opening to securing the final slat.

Between-column installation · Cut-to-fit aluminum slats · No welding in the illustrated method

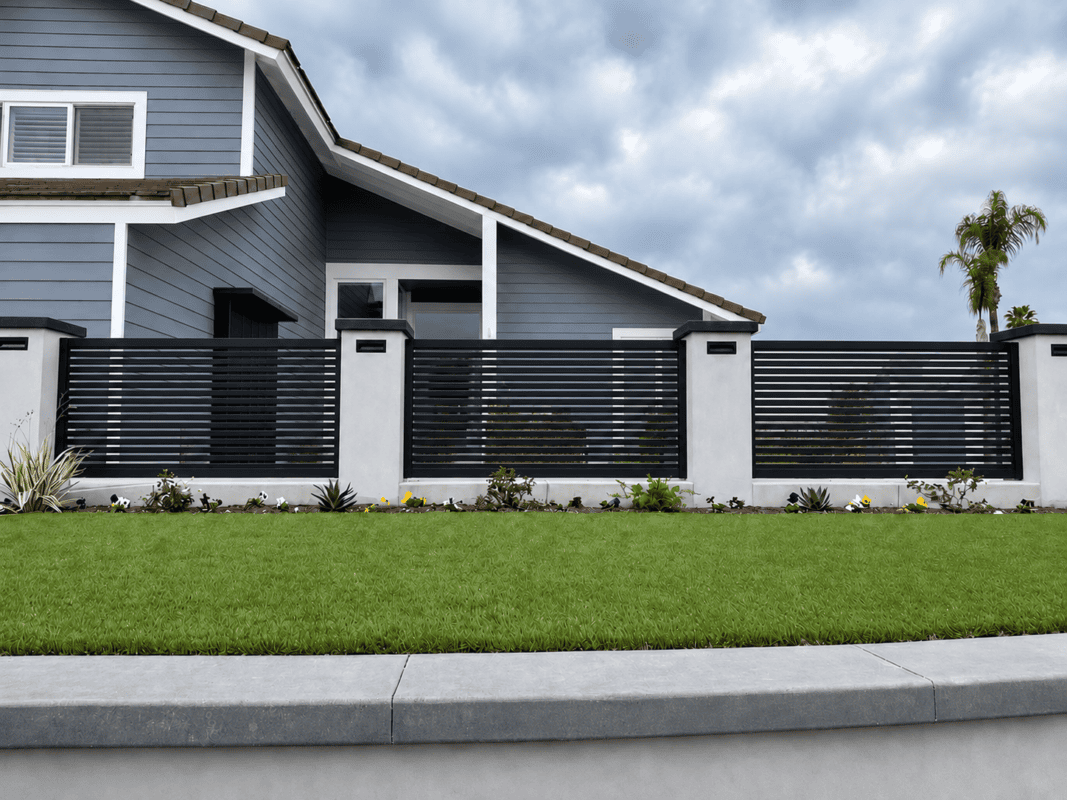
Black San Francisco horizontal aluminum fence panel between masonry columns
San Francisco style: one of Alumission’s between-column fence options.

PREPARE THE WHOLE JOB

Tools, equipment & protective gear.

Prepare for measuring, aluminum cutting, support drilling and final assembly. Your anchor choice determines the masonry bit, hole-cleaning tools and tightening equipment.

Measure & mark

  • Tape measure, pencil or fine marker and square
  • Long spirit level; laser or string line for several openings
  • Masking tape and a written opening-by-opening cut list

Cut & prepare

  • Saw rated for aluminum with a compatible non-ferrous blade
  • Clamps, stable padded work supports and support for long slats
  • Deburring file/tool and brush or vacuum for chips

Drill the profiles

  • Drill/driver and metal bits suited to the actual post detail
  • Separate access-hole and fixing-hole bits where the profile requires them
  • Correct driver bits, sockets and extensions for the selected hardware

Anchor to supports

  • Hammer/rotary drill and specified masonry bit where required
  • Depth stop, anchor-specific hole brush and approved cleaning equipment
  • Specified anchors, washers, durable shims and torque wrench where required

Assemble & finish

  • Correct spacers, slat retainers and compatible screws
  • Caulking gun and exterior silicone compatible with the finish where specified
  • Rivet tool if the selected side-post cap uses rivets; clean cloths

Protect & clean up

  • Eye and hearing protection for cutting and drilling
  • Dust extraction and respiratory protection appropriate to masonry work
  • Handling gloves for sharp profiles; follow tool instructions near rotating parts
  • Stable access equipment where needed and a container for sharp offcuts

START WITH SOUND SUPPORTS

Confirm the opening before you cut.

This guide covers horizontal aluminum fence panels mounted between existing supports. The receiving posts transfer the panel loads into those supports through the selected fasteners.

  1. Inspect the columns and their foundations; identify the material behind any decorative finish.
  2. Measure top, middle and bottom widths, finished height and lower clearance.
  3. Confirm the kit, post profiles, cap details and any center support.
  4. Select the mounting hardware for the structure, loads and exposure.
Match the guide to your parts. The original video uses an earlier post arrangement. Current Side Post caps and kit support configurations differ; the steps below explain where to check.

CHECK YOUR ORDER

Materials to have on site.

  • Correct between-column fence kit and matching side posts
  • Selected slats and the style’s spacer schedule
  • Compatible top retainers, screws, covers and caps
  • Support-specific anchors or structural timber screws, washers and suitable shims
  • Center-post assembly and suitable foundation/anchors where required
  • Exterior silicone only where specified for the chosen cap

Review the actual kit contents. Mounting anchors, tools and every site-specific supply should not be assumed included.

Installing in soil instead?

Use the separate guide for steel inserts and concrete footings.

View the in-ground installation guide

WATCH THE ORIGINAL DEMONSTRATION

See the panel come together.

Alumission’s 1-minute 29-second video shows post drilling, wall fastening, channel-to-channel measuring, slat insertion, top brackets and finishing.

Watch the sequence, then use the instructions for your current kit and mounting hardware. The demonstrated hole sizes and fixing positions are examples for the profile shown.

Open the installation video on YouTube

FROM OPENING TO FINISHED PANEL

Install your aluminum fence panels in 10 steps.

These 3D schematics explain the assembly sequence. They are not scaled shop drawings or anchor designs; use the detail for your actual profile, kit and support.

Step 1: Inspect the opening and plan the panel — three-dimensional assembly schematicSTEP 01 / ASSEMBLY VIEWTOP · MIDDLE · BOTTOMMeasure the clear opening at three heights
Assembly schematic 1 of 10. Geometry simplified for clarity.

STEP 01

Inspect the opening and plan the panel

Remove old infill without weakening the columns. Check concrete, masonry or timber for movement, cracking, rot and loose finishes. Measure clear width at the top, middle and bottom, plus the intended panel height and lower clearance. Confirm the selected kit and support arrangement before drilling.

Check before moving on: Record each opening separately. Stucco, stone veneer and siding are finishes, not proof of a structural anchor surface.

Step 2: Prepare the posts and matching end details — three-dimensional assembly schematicSTEP 02 / ASSEMBLY VIEWUse the bottom detail for your exact profile
Assembly schematic 2 of 10. Geometry simplified for clarity.

STEP 02

Prepare the posts and matching end details

Identify the exact post profile and matching caps. Cut posts to the planned height using an aluminum-rated saw setup; clamp and deburr the cuts. Fit any bottom cap or slat support that must be installed before the slats. The original page shows a 3-channel flat-cap detail; current Side Posts use their own mechanically attached caps.

Check before moving on: The current Side Post Cap uses suitable #8 screws or 1/8-inch aluminum rivets. Do not substitute a 3-channel cap or rely on silicone for this connection.

Step 3: Make the access and fixing holes — three-dimensional assembly schematicSTEP 03 / ASSEMBLY VIEWAccessFixingDifferent holes have different functions
Assembly schematic 3 of 10. Geometry simplified for clarity.

STEP 03

Make the access and fixing holes

Lay out the connection pattern specified for the selected anchors and post profile. Where the profile uses an access hole, drill only the accessible face first, then the smaller aligned fixing hole in the mounting face. Keep chips out of the receiving channels and deburr both holes.

Check before moving on: The video shows 1/2–3/4-inch access holes and 1/4–3/8-inch fixing holes for its profile. These are demonstration ranges, not a universal drilling schedule.

Step 4: Mark, drill and clean the supports — three-dimensional assembly schematicSTEP 04 / ASSEMBLY VIEWDrill toanchor detailCorrect bit · depth · cleaning · edge distance
Assembly schematic 4 of 10. Geometry simplified for clarity.

STEP 04

Mark, drill and clean the supports

Hold the post at its intended elevation, check it for plumb and transfer the fixing locations to the structural support. Remove the post and drill using the anchor manufacturer's bit, depth and drilling method. Clean each hole by the specified procedure before installation.

Check before moving on: Confirm edge distances and the actual substrate. Hollow block, grouted block, solid concrete and wood require different fastening details.

Step 5: Fasten and align both side posts — three-dimensional assembly schematicSTEP 05 / ASSEMBLY VIEWPlumb, shim, align, then tighten as specified
Assembly schematic 5 of 10. Geometry simplified for clarity.

STEP 05

Fasten and align both side posts

Start the selected fasteners without fully tightening. Use suitable shims at fixing points to keep the post straight and plumb against an uneven surface. Align the two receiving channels, recheck the top and bottom opening, then tighten using the specified installation method and torque.

Check before moving on: Do not pull a bowed post flat with excess torque or crush its aluminum wall. The channel-to-channel opening should remain consistent.

Step 6: Install a center support when the kit requires one — three-dimensional assembly schematicSTEP 06 / ASSEMBLY VIEWSpan 1Span 210′ and 12′ listed kits use a center assembly
Assembly schematic 6 of 10. Geometry simplified for clarity.

STEP 06

Install a center support when the kit requires one

Current between-column kits in 3-, 4-, 5-, 6- and 8-foot widths use two side posts. The listed 10-foot kit uses two 5-foot spans and the 12-foot kit uses two 6-foot spans with a center assembly. Install the specified center support on suitable structural support before measuring either span.

Check before moving on: Kit configuration is not a universal structural span rating. Confirm the actual height, privacy pattern, wind exposure and mounting conditions. A center base cannot simply stand on soil or loose pavers.

Step 7: Measure, cut and test-fit the slats — three-dimensional assembly schematicSTEP 07 / ASSEMBLY VIEWTest one slat firstMeasure the installed receiving channels
Assembly schematic 7 of 10. Geometry simplified for clarity.

STEP 07

Measure, cut and test-fit the slats

With all supports fixed, measure each span between the receiving channels at the top and bottom. Apply the engagement and fitting allowance required for that profile. Cut and deburr one slat, then test that it seats correctly at both ends without forcing the posts apart. Only then cut the remaining batch.

Check before moving on: Use actual installed dimensions. Nominal kit width, clear opening and finished slat length are different; do not copy a gate cut formula.

Step 8: Build the selected slat and spacer pattern — three-dimensional assembly schematicSTEP 08 / ASSEMBLY VIEWInsert evenly · match spacers at both ends
Assembly schematic 8 of 10. Geometry simplified for clarity.

STEP 08

Build the selected slat and spacer pattern

Insert the first slat evenly into both channels and seat it on the intended bottom support. Add the matching spacers at both ends and continue with the chosen style's sequence. Check level and cumulative height as you work, keeping room for the final retainer and caps.

Check before moving on: Do not hammer a tight slat into place. Check burrs, cut length, alignment and the correct spacer size first.

Step 9: Secure the top slat and close unused channels — three-dimensional assembly schematicSTEP 09 / ASSEMBLY VIEWTop retainersSecure the top-slat ends with the correct hardware
Assembly schematic 9 of 10. Geometry simplified for clarity.

STEP 09

Secure the top slat and close unused channels

Fit the specified retainers at the top-slat ends. The original video uses stainless L-brackets with compatible screws. Close unused channels with the correct covers, cutting and deburring them as required. A different screw-channel post may have a different retention detail.

Check before moving on: Silicone and a decorative cover do not replace the mechanical slat-retaining connection.

Step 10: Fit the caps and complete the final check — three-dimensional assembly schematicSTEP 10 / ASSEMBLY VIEWCaps secure · slats retained · supports firm
Assembly schematic 10 of 10. Geometry simplified for clarity.

STEP 10

Fit the caps and complete the final check

Install caps using the fastening method for the actual profile: mechanical attachment for the current Side Post Cap, or compatible silicone where specified for a different cap. Remove chips and protective residue. Check post security, retained slats, consistent gaps, covers, caps and lower clearance.

Check before moving on: Keep the panel clear of soil and trapped debris. Save the kit details, anchor instructions and remaining matching parts for future maintenance.

MEASURE ONCE. VERIFY BEFORE CUTTING.

Your opening-by-opening checklist.

RecordWhat to checkWhy it matters
Clear openingTop, middle and bottom width between supportsReveals taper and helps select a kit
Finished panel heightTop line, bottom clearance and cap detailSets the post cut and slat/spacer schedule
Support materialConcrete, hollow/grouted masonry or sound structural timberDetermines the anchor or screw system
Installed channel spanMeasure after posts and any center support are fixedUsed with profile allowances to establish slat length
One test slatSeats at both ends without forcing the postsConfirms the cut before making the whole batch
No universal “subtract X inches” formula. The correct cut depends on the receiving profile and required engagement. For a two-span kit, measure each span separately.
Original Alumission installation detail measuring between the receiving post channels
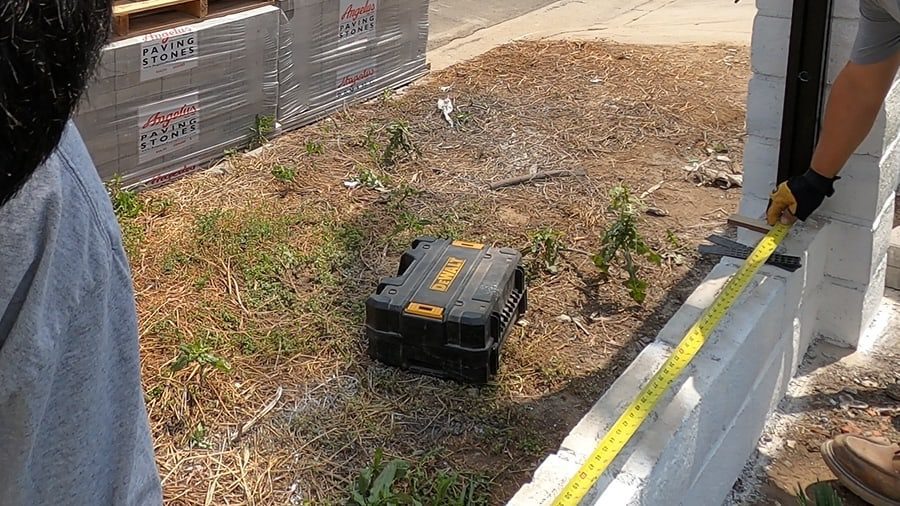
Original tutorial detail: measure the installed channels.
Original Alumission top slat retention using an L bracket
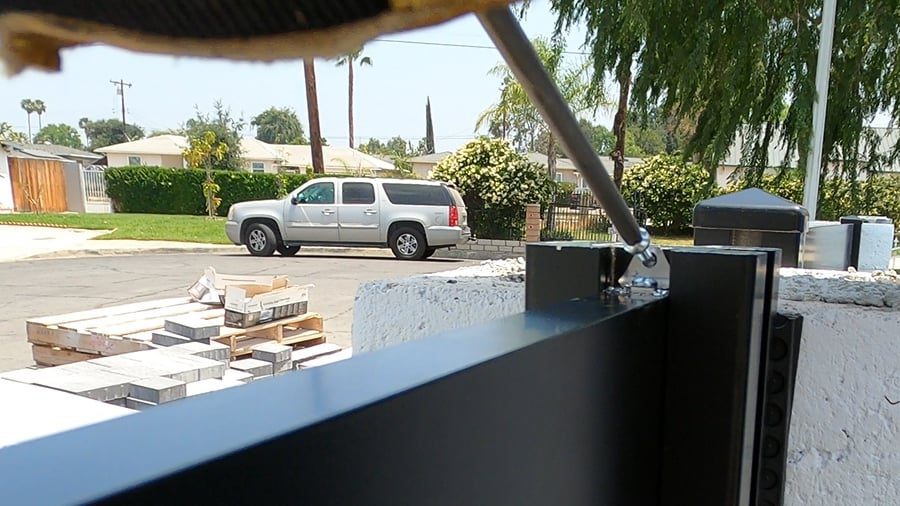
Original tutorial detail: retain the top slat at both ends.

FIND YOUR ANSWER

Aluminum fence panel installation FAQs.

Browse six topics or search for a word such as “anchors,” “caps,” “cutting” or “spacers.”

42 questions in 6 categories

Planning & choosing a kit

What kind of aluminum fence panel does this guide cover?

This is a field-assembled horizontal slat panel between existing columns, pillars or structural posts. You mount receiving posts, cut the slats and build the panel in place. Preassembled ornamental picket panels, wall toppers and freestanding fences can use different connections.

Can I replace old wood or steel panels and keep the columns?

Yes, if the existing supports and their foundations are suitable for the new panel loads. Remove the old infill carefully, inspect the supports and establish an anchor detail before reusing them. A sound-looking decorative surface does not establish the condition of the structure behind it.

Which Alumission kit should I buy?

Start with the Between Columns kits. Choose the style, clear opening and height together. Send photos and top/middle/bottom measurements if the opening is irregular; a side-panel kit or wall-topper kit may use a different mounting arrangement.

Do I need welding?

The illustrated assembly uses cut aluminum profiles, drilled connections, mechanical fasteners and the specified caps. Welding is not part of this method. You still need the correct saw, drill, substrate tools and protective equipment.

Does an 8-foot panel need a center post?

The current listed between-column kits through 8 feet use two side posts; 10- and 12-foot kits include a center assembly. That product configuration replaces the older page's blanket rule for widths over 6 feet. Confirm suitability for your height, slat pattern, wind exposure and supports before ordering.

Do I need permission to replace a fence panel?

Check local fence rules, property boundaries, any HOA requirements and restrictions on height or visibility before ordering. Replacing infill can still change the fence's appearance, openness and wind loading. Pool barriers and guards require their own compliance checks.

Can I install the panels myself, and how long will it take?

A capable DIY installer with suitable cutting and anchoring experience can tackle a straightforward approved opening. Plan time for removal, measurements, drilling, cutting, assembly and any sealant or adhesive-anchor cure. The 89-second video demonstrates the sequence, not the job duration.

Measurements, spacing & cutting

What measurements should I send before ordering?

Record clear width at the top, middle and bottom; finished panel height; bottom clearance; support material and dimensions; and photos from both sides. For multiple openings, label them A, B and C and measure each separately. Include your ZIP code and desired style.

Is the kit width the same as the slat cut length?

No. Nominal kit width identifies a configuration. Clear opening is measured between existing supports, while slat length depends on the installed receiving channels and the required engagement and fitting allowance. Measure the assembled support layout and test-fit before batch cutting.

How do I cut aluminum fence slats accurately?

Use a saw and non-ferrous blade rated for the profile, support long pieces, clamp securely and deburr cuts. Cut one test piece first. Label different spans and keep each batch together; small opening differences can make a single repeated cut length unsuitable.

What if the columns are not plumb or the opening tapers?

Measure at several heights and check both support faces. Establish straight, parallel receiving posts using a suitable fastening and shim detail. Do not force equal-length slats between tapered channels or assume trimming every slat differently will solve an unstable support.

How much clearance belongs under the panel?

Set the bottom line from the finished surface, allowing for drainage and the fence's purpose. Local pool or containment requirements may limit gaps. Keep slats out of soil and avoid blocking drainage; the panel is not a retaining wall.

Can I change the spacer size or make the fence 25% open?

Confirm an approved slat-and-spacer schedule before changing the pattern. Openness depends on the complete visible panel geometry, not simply the number of spacers. A rule about visibility may measure the whole fence differently; obtain the applicable interpretation and confirm the resulting height and parts count.

Can horizontal aluminum panels follow a slope?

Plan a stepped or otherwise compatible layout before cutting. Do not assume field-assembled horizontal slats can rack like an ornamental picket panel. Check lower gaps, changes in the top line and any adjacent gate clearance for every opening.

Concrete, block, brick & wood anchors

Can I attach the panel to concrete columns?

Yes, where the columns and their foundations are suitable and the chosen anchor has the required concrete application. Confirm concrete condition, edge distances, embedment, spacing and installation torque before marking the holes. The video does not specify a universal anchor for every column.

Can I attach aluminum fence panels to hollow block?

Only with a fastening system and support design suitable for that exact masonry condition. Hollow block is not interchangeable with solid concrete or fully grouted block. Confirm the block, grout locations, connection loads and approved anchor installation before drilling.

Can I fasten directly to brick, stucco or stone veneer?

Do not treat veneer or render as the structural support. Determine what is behind the finish and use a connection designed to transfer the fence loads to that structure. Brick masonry also needs an anchor approved for its actual condition; a concrete-only anchor is not automatically suitable.

What screws should I use for existing wood posts?

Use exterior structural fasteners selected for the timber, required penetration, loads and exposure. Check the wood for rot or splitting and confirm the post's foundation. Choose compatible corrosion protection, particularly around treated timber, and follow the fastener's pilot-hole instructions.

What size masonry drill bit and hole depth do I need?

Use the exact anchor manufacturer's instructions for the selected anchor and substrate. The metal access hole in the aluminum and the anchor hole in the wall serve different purposes and can be different sizes. Mark depth with a stop and account for the specified cleaning and embedment procedure.

Do anchor holes need cleaning?

Follow the selected anchor's printed cleaning instructions. Dust can affect installation and performance. Some systems require a defined brush-and-air sequence; others permit approved dust-extraction drilling. Have the specified cleaning tools on hand rather than assuming any vacuum or quick blow is enough.

How many anchors should each post have?

Use the connection schedule for the actual post, support and loads. The older video's approximate hole positions are examples, not a structural schedule. Required edge distances, post height, wind exposure and masonry condition can change both the number and location of fixings.

Posts, caps & hardware

Are mounting anchors included in the kit?

Do not assume support anchors or timber screws are included. They must suit the existing structure. Check the current kit contents and separately list anchors, washers, shims, silicone and any extra tools needed for your mounting condition.

Are Side Post caps and 3-channel post caps interchangeable?

No. The current Side Post Cap is made only for the matching Side Post. A 3-channel flat cap and a flat cap with a steel-tube opening serve different profiles and installations. Identify the post before ordering caps.

Should I glue the Side Post caps with silicone?

The current Side Post Cap listing calls for suitable #8 screws or 1/8-inch aluminum rivets at the top and bottom. The older video's silicone step applies to its cap arrangement. Use silicone only where the selected cap detail specifies it; it is not a replacement for the required mechanical attachment.

What do the larger holes in the post do?

In the illustrated profile they provide tool or fastener access to a smaller fixing hole in the mounting face. They are not the same as the wall-anchor hole. Drill the actual profile's specified faces and avoid damaging covers or slat channels.

What holds the slats in the panel?

The channels guide the slats, the specified bottom detail supports the stack, and the top retention detail secures it. The original method uses L-brackets and compatible screws at the top-slat ends. Follow the actual profile's connection detail.

Can I place the center-post base on paving stones?

Do not assume pavers or an ordinary thin slab are a suitable foundation. The center assembly needs a structural support and anchor detail appropriate to the loads. If the location is soil, use an approved foundation arrangement before assembling the panel.

Can the same side post also carry a gate?

Only if the complete post, anchor and supporting structure are designed for the gate's weight and operating forces as well as the fence. A fixed infill connection is not automatically a hinge-post connection. Confirm gate width, hardware and support requirements separately.

Assembly, finishing & troubleshooting

Why will a slat not slide into the channels?

Check for burrs, chips, an overlong cut, twisted posts or incompatible parts. Compare the channel spacing at the top and bottom and test one slat. Correct the cause rather than hammering the slat or spreading the posts.

Why are my slat gaps uneven?

Check that matching spacers are seated at both ends and that the first slat is level. Remove debris from the channels and verify the spacer schedule. Recheck the pattern periodically so a small error does not accumulate across the full height.

What if the last slat does not fit?

Recheck the post cut height, lower support position, slat count and every spacer size. Allow space for the top retention and cap details. Do not cut away a retainer or force a cap over an incorrect stack.

Why does the panel or post move after installation?

Identify whether movement occurs in the support, anchors, receiving post or slats. An unstable column or loose anchor cannot be fixed by adding silicone to the slats. Stop adding load and have the affected connection corrected using an appropriate repair detail.

Can I reuse an old anchor hole?

Only if the selected anchor instructions and the support condition allow the proposed repair or reuse. An oversized, damaged or abandoned hole may require a different approved detail. Do not pack it with debris or substitute a larger fastener without checking edge distances and capacity.

What silicone should I use where a cap needs adhesive?

Use an exterior sealant compatible with the aluminum finish and adjacent materials. Follow the specified surface preparation and curing time. Keep drainage paths clear and remember that adhesive for a decorative cap does not replace structural fasteners.

Can a damaged slat be replaced later?

Often the assembly can be accessed by removing the applicable caps, covers and top retainers, then lifting slats in sequence. Confirm access and the exact profile first. Support components during removal and replace any damaged retention hardware before returning the panel to service.

Care, special uses & project help

Can these panels be used as a pool barrier?

Only if the complete installed fence and gates meet the requirements for that location. Check height, gaps, climbability, lower clearance and gate hardware. A horizontal pattern or ordinary fence kit is not automatically an approved pool enclosure.

Can I use this guide for a balcony railing or guard?

No. Guards need a system designed for their required loads, geometry and connections. A decorative fence panel installation guide does not establish guard compliance. Use the instructions and approval for the actual railing system.

Does a more private panel put more load on the supports?

A less open panel can change wind loading significantly. Confirm the support and anchor design when changing from an open fence to a privacy pattern, increasing height or installing in an exposed location. Do not assume the old infill's connections remain suitable.

How should I clean the finished fence?

Remove cutting chips promptly and clean using a soft cloth, mild soap and water, following the finish-care directions. Avoid abrasive tools and unapproved harsh chemicals. Keep soil, leaves and standing debris away from the lower panel.

What should I check after installation?

Check secure posts and anchors, retained slats, consistent gaps, seated covers and correctly attached caps. Inspect again after unusual wind or movement. Investigate new looseness, cracked support material or damaged finishes instead of merely hiding them.

What affects the cost of panel installation?

Include the selected kit, removal of old infill, support repairs, mounting hardware, center-support foundations if required, cutting, access and labor. Measure every opening before comparing quotes so the same styles, heights and mounting work are included.

What should I send for technical help or a quote?

Send your kit or order details, labeled opening measurements, desired height and style, support material, ZIP code and clear photos. Include close-ups of a problem connection and a wider view. Use technical support for assembly questions or the project form below for a quote.


Installation references

Assembly guidance follows Alumission’s original demonstration and current product listings. Anchor selection and installation must follow the chosen manufacturer’s instructions for the actual support.

TURN YOUR OPENING INTO A FINISHED FENCE

Choose the right panel and parts.

Send your opening widths, height, support material, ZIP code and photos. Alumission can help you choose a style, confirm component compatibility and answer assembly questions.

Request a project quote below or call (888) 615-5001.

This field is for validation purposes and should be left unchanged.
Full Name(Required)